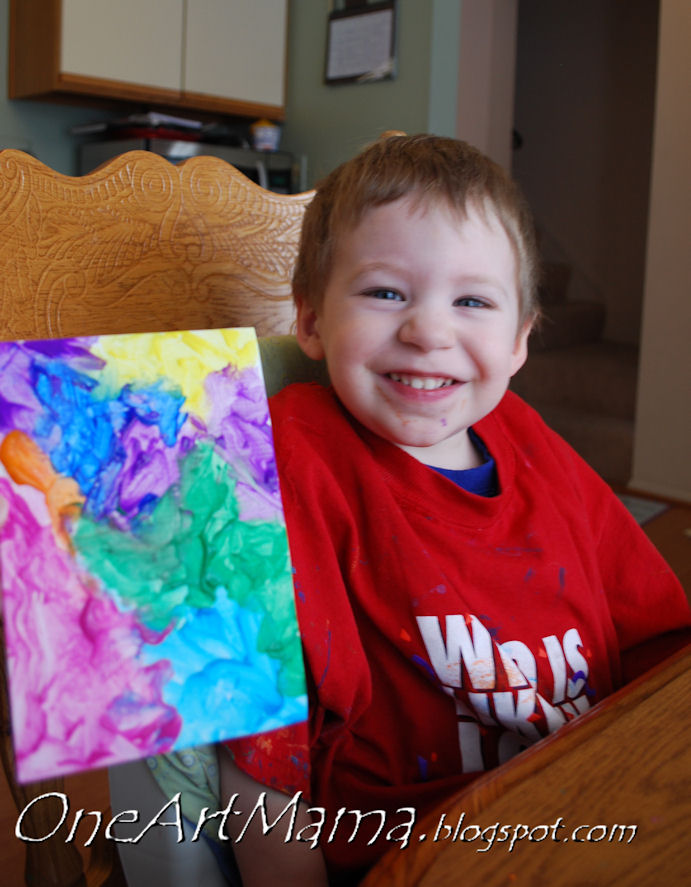
Maybe I’m old-fashioned, but I’m a firm believer in the handwritten thank-you note. Just ask my husband. He took a photo of me when we were on our honeymoon in which I’m sitting at the table in a bathrobe and slippers, writing thank-you’s for all of our wedding gifts. He couldn’t believe I was doing it then. First he laughed at me, then said, “Can’t you wait till we get home and do that?” Nope. I was overwhelmed by the generosity of our family and friends and felt it was important to properly show my (our) appreciation. Needless to say, I want to teach Noah the same thing. I want him to notice the kindness of others and to express gratitude to the people who love him (and shower him with toys, clothes, and all kinds of fun things). One way I try to do this is by involving him in the process of making gifts and cards for other people, and having him participate in making thank-you’s for the things he receives. This fun project kind of combines the two. Noah loves to paint, so I decided to let him use his artwork as the design for one-of-a-kind notecards. We keep a stash on hand so we can use them for birthday, thank-you, or other cards “from Noah” and we’ve also been known to tie a bunch of them together and give the set as a gift.
ORIGINAL ARTWORK NOTECARDS
Materials:
– canvas paper (available at Michaels or other craft/art supply stores)
– paint and brushes (we use Crayola washable kids’ paint for just about everything)
– white cardstock
– paper cutter
– adhesive
– white envelopes (WalMart sells a nice 4×6 size pretty reasonably)
STEP 1: Cut canvas paper into 4.25″ x 5.5″ pieces.
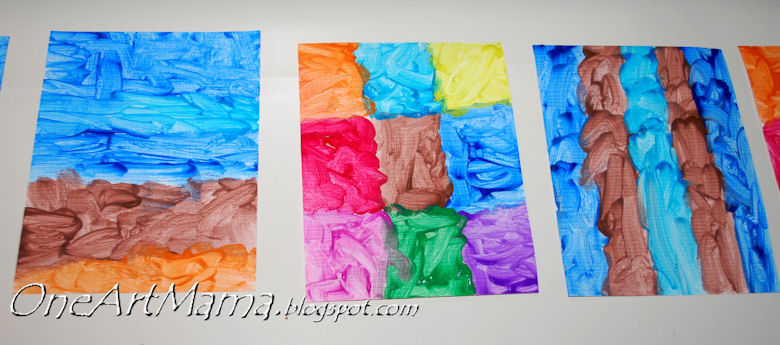
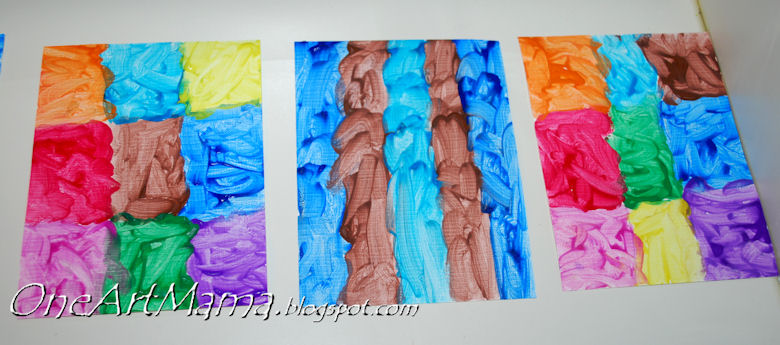
STEP 2: Paint each canvas piece as desired. Sometimes I let Noah go at it and do whatever he wanted, which created an interesting mix of colors like this:
On some of the cards, I drew light pencil lines first, to create either stripes or boxes. Noah really loved that because it was something different, and I was really surprised by how well they turned out.
Older artists can draw or paint any kind of design they want, and even include words like “Thank You” or “Happy Birthday.”
STEP 3: Cut cardstock in half so that you have two pieces that are 4.25″ x 11″ from each sheet. Fold in half…this will be your card base.
STEP 4: After artwork has completely dried, use adhesive to attach one piece of artwork to the front of each folded card base. Now the art is the card front.
OPTIONAL STEP: Stamp a greeting inside the card if desired.
At this point, you can either write in the card yourself and send it, or you can choose to give it as a gift. For a gift, stack anywhere between 6 and 10 cards with an equal number of blank envelopes underneath. Tie it up with a pretty ribbon and put in a gift bag. I wish I had thought to take a photo of them all packaged up when we gave Noah’s Grammy a set for Christmas. I did get this shot, though, after she opened them up.
These are quick, easy, and surely cheaper than buying cards at the store! Plus, Noah literally wants to paint every single day, so this gives us something useful to do with all of his masterpieces. Everyone loves a handmade gift or card, especially when it comes from such a cute little artist. 🙂
Meanwhile, I have to share this story. Yesterday was gorgeous around here; the first beautiful warm day we’d had in over 2 weeks. So, needless to say, we went to the playground. Several times. The one at the end of our street has this fun tunnel slide that Noah just loves.
As he’s sliding and playing, all of a sudden, I hear the slide “talking.” Noah is up top, I can’t see him, but he’s yelling through the tunnel, which of course makes a great loud echo for the whole neighborhood to hear. “NOAH MADE POO-POO! NOAH NEEDS A NEW DIAPER! POO-POOOOOOOOO!” Yup, that’s our life. Don’t you love it? I do!
I shared this project
here.


What pretty cards…Very nice.
You are such a good Mama teaching him to be thankful.
Funny story…I’m sure the neighbors loved it. 🙂
I’m with you—I firmly believe in handwritten thank you notes, and make all of the kids get involved when we write them. I will have to have Cooper design them too….I have had him do handprints on the inside, etc. but never blank sheets to decorate. Great idea!
Amy! Thanks so much for posting my blog button! What a fun surprise! I posted yours on my Button Exchange page! I love your blog! I’m your latest follower! In order to show your button, I had to tweak your code. You have a double “http://” code in there (just wanted to send you a heads up 😉 Once tweaked, it worked beautifully! Thanks so much! I love the picture plaque!!! I think I’ll try it with some of our recent Spring Break photos!