30 Minute Gift Idea: Hand Lettered Sign
Thanks to Plaid Crafts for sponsoring today’s post; all opinions are, as always, honestly my own.
I don’t know about you, friends, but I am in full holiday prep mode! Christmas is just a little less than a month away, which means it’s time to make my list and check it twice. I always enjoy giving handmade gifts to special people in my life, but with all the demands of the holiday season, I don’t have as much time to create as I’d like. So, I’m always looking for quick and simple projects that look great while not taking forever to complete. Today, I want to share with you a little hand lettered & stenciled sign that makes a great gift for just about anyone, and it takes less than half an hour! Take a look…
Materials:
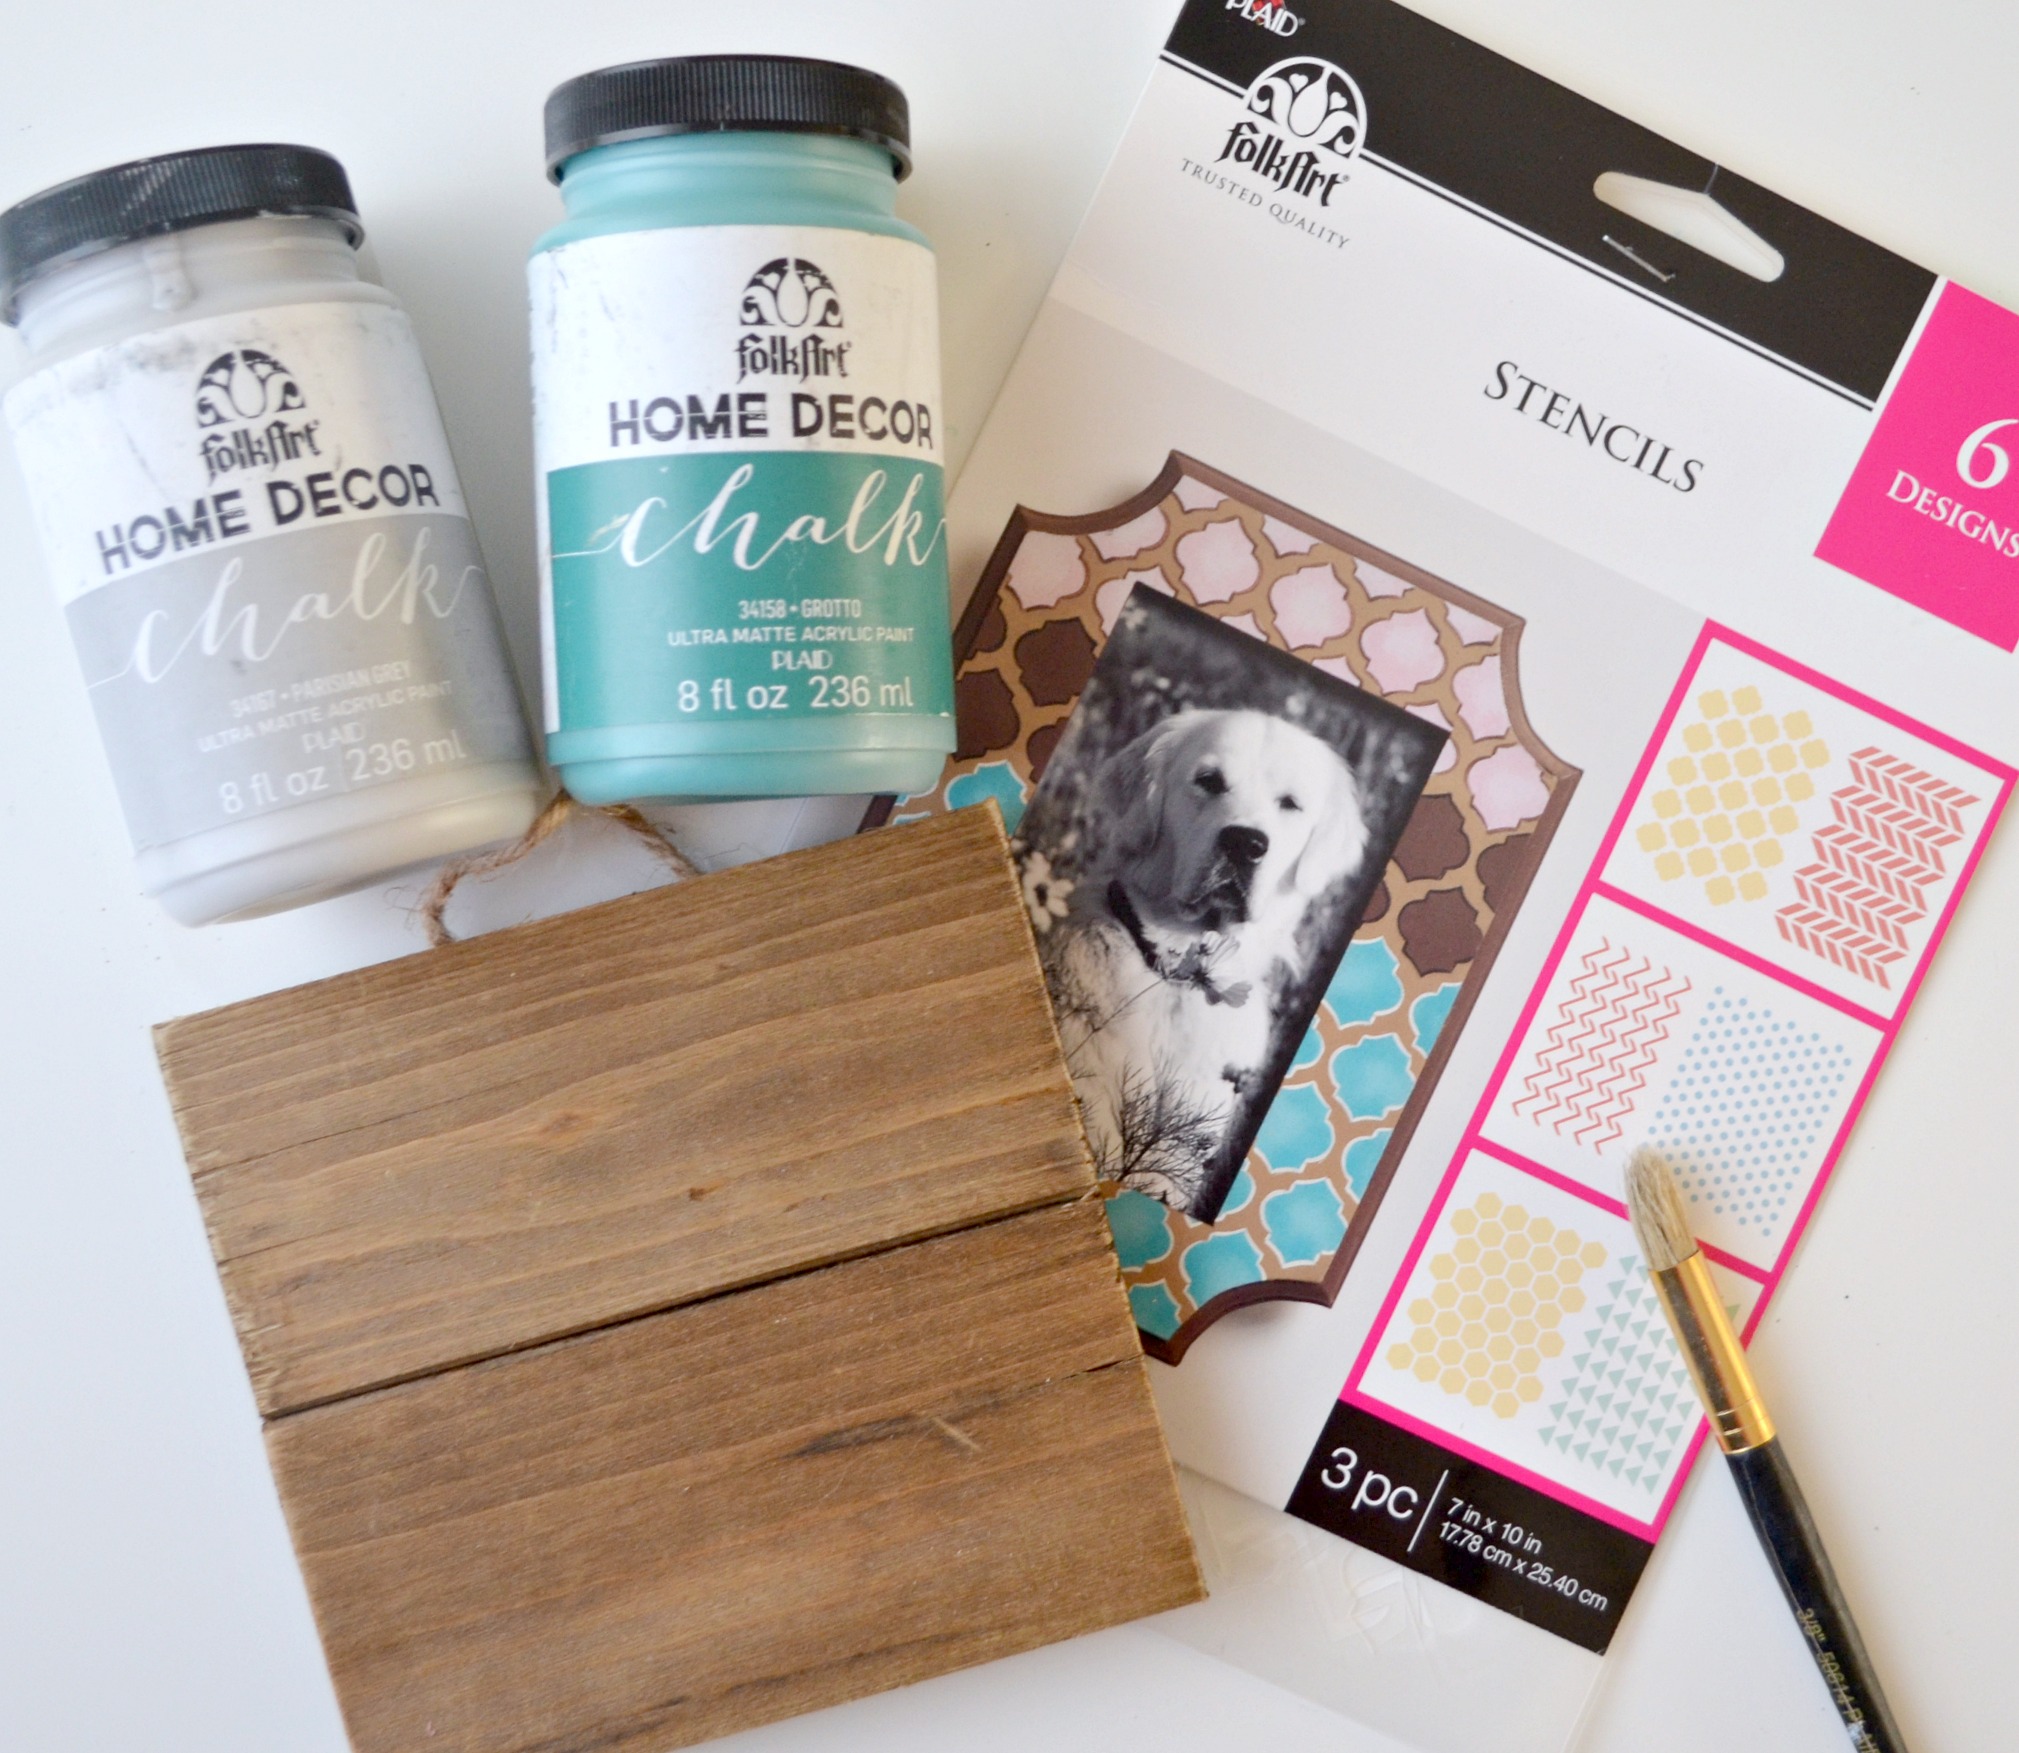
Small wooden sign
FolkArt Home Decor Chalk: Parisian Grey & Grotto
FolkArt Metallics: Pure Gold
FolkArt 3 pc Design Stencils
FolkArt Stencil Brush, Paintbrush, and Liner Brush
Pencil
Painters’ Tape
Sandpaper and/or Power Sander
Creating Your Sign
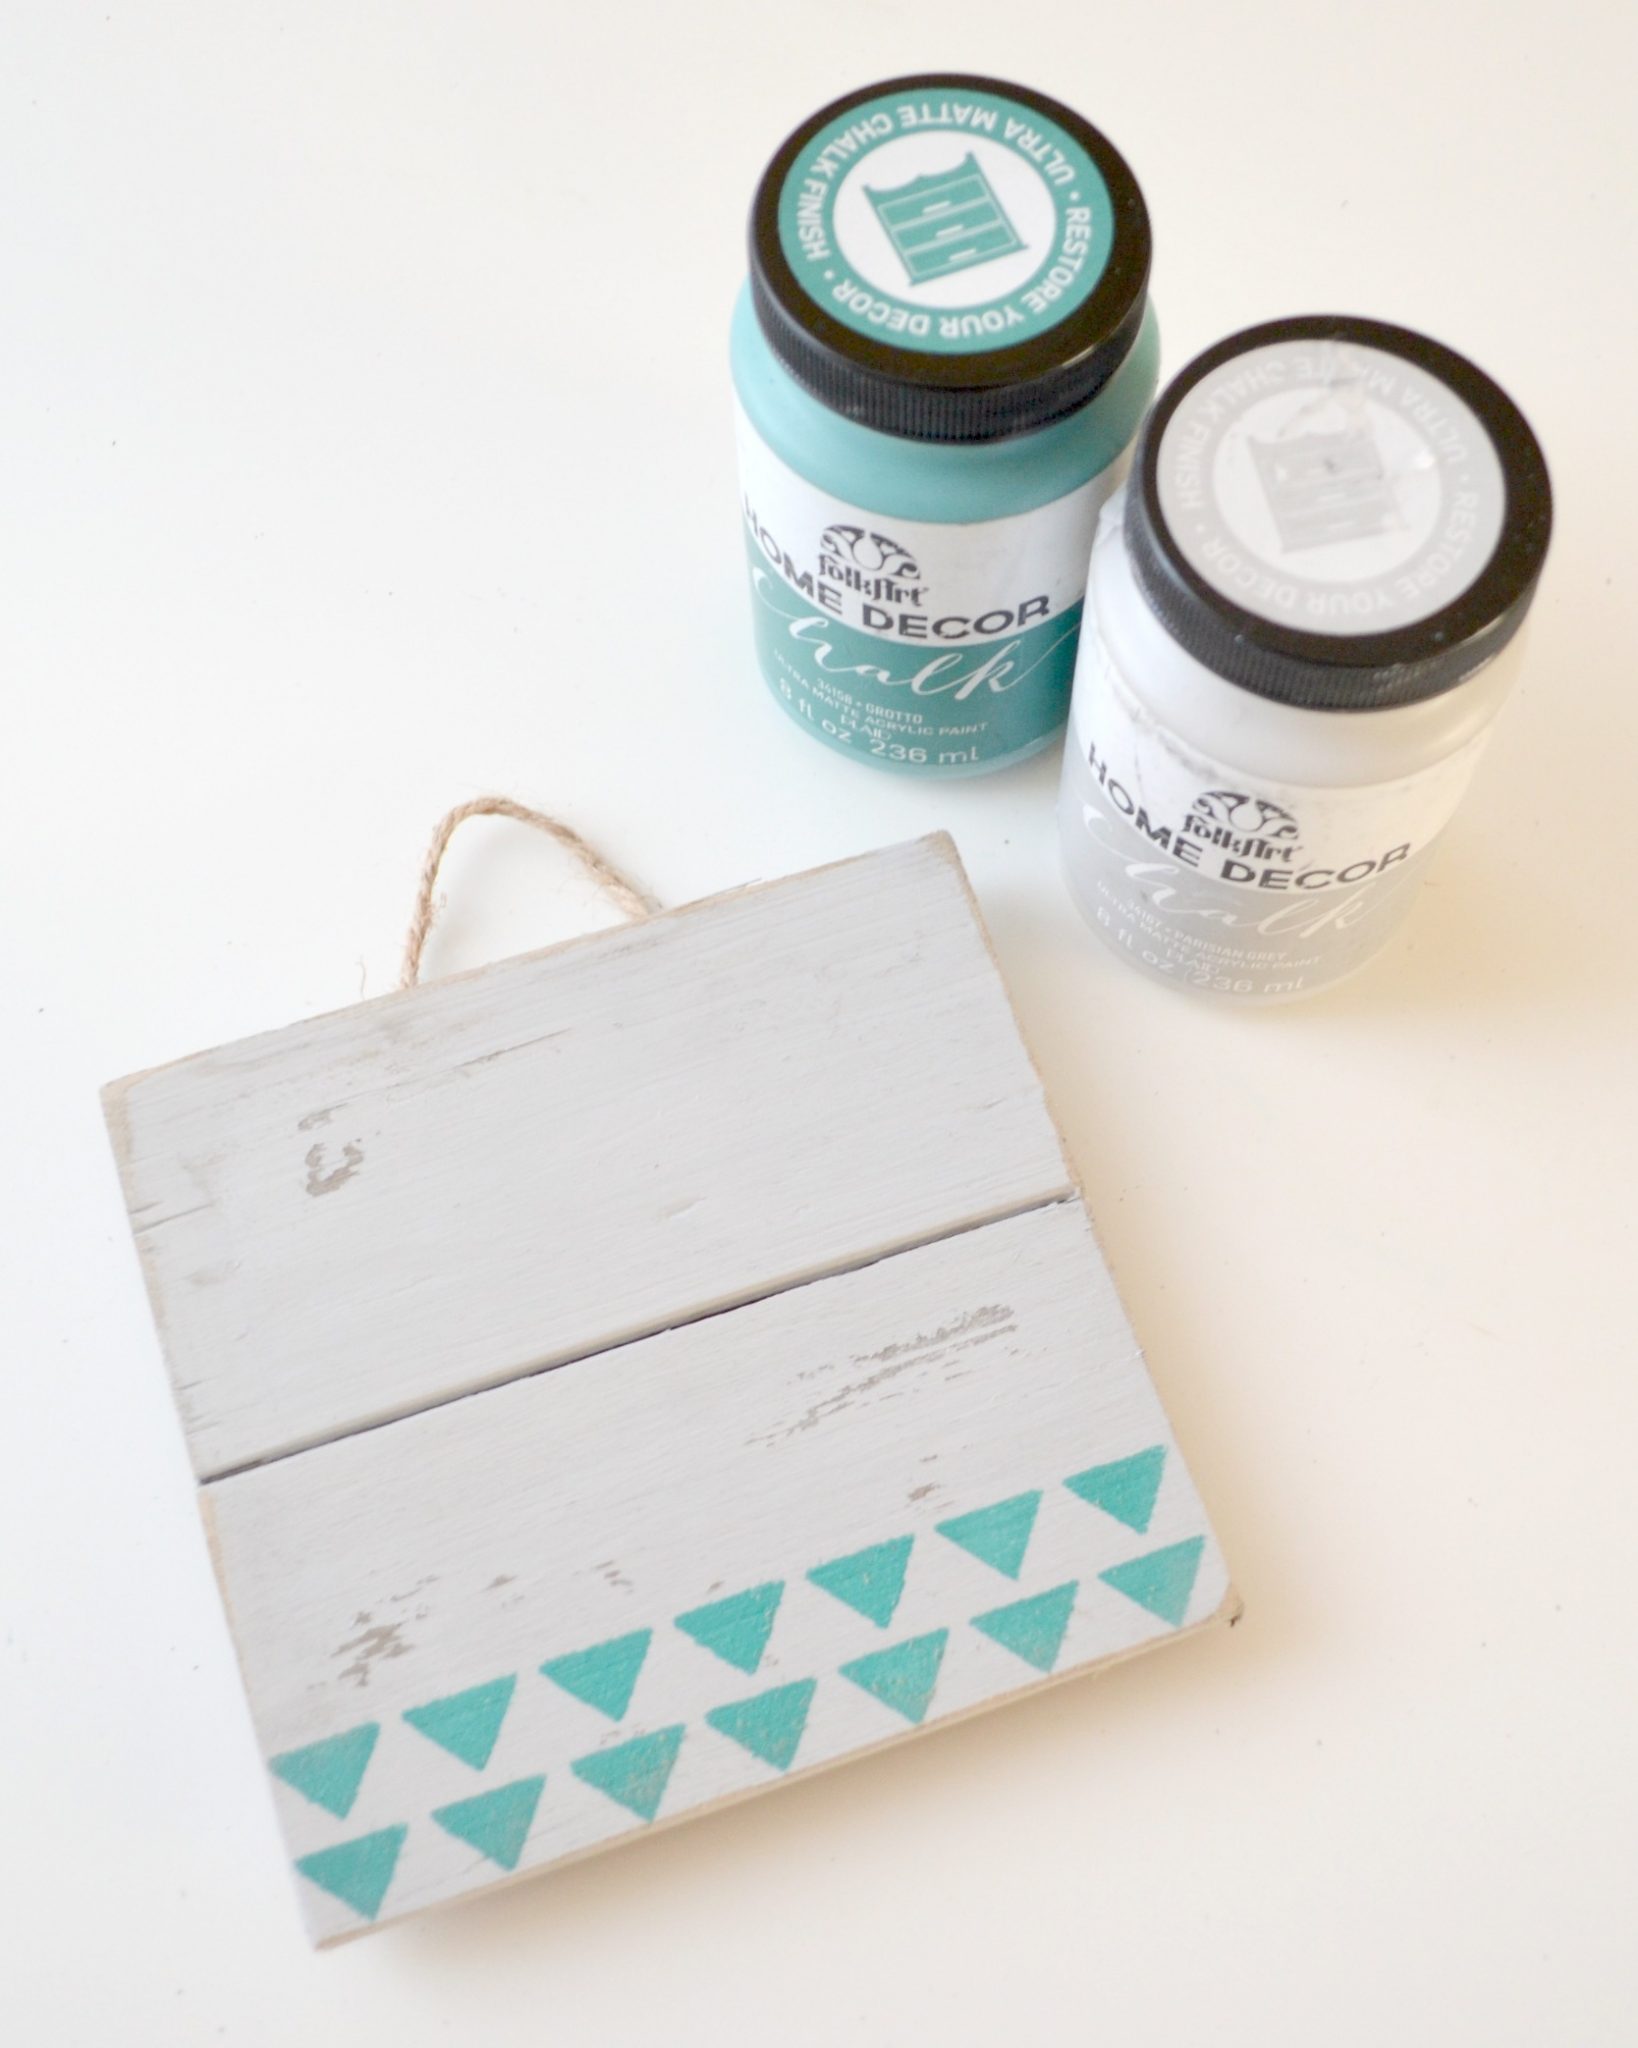
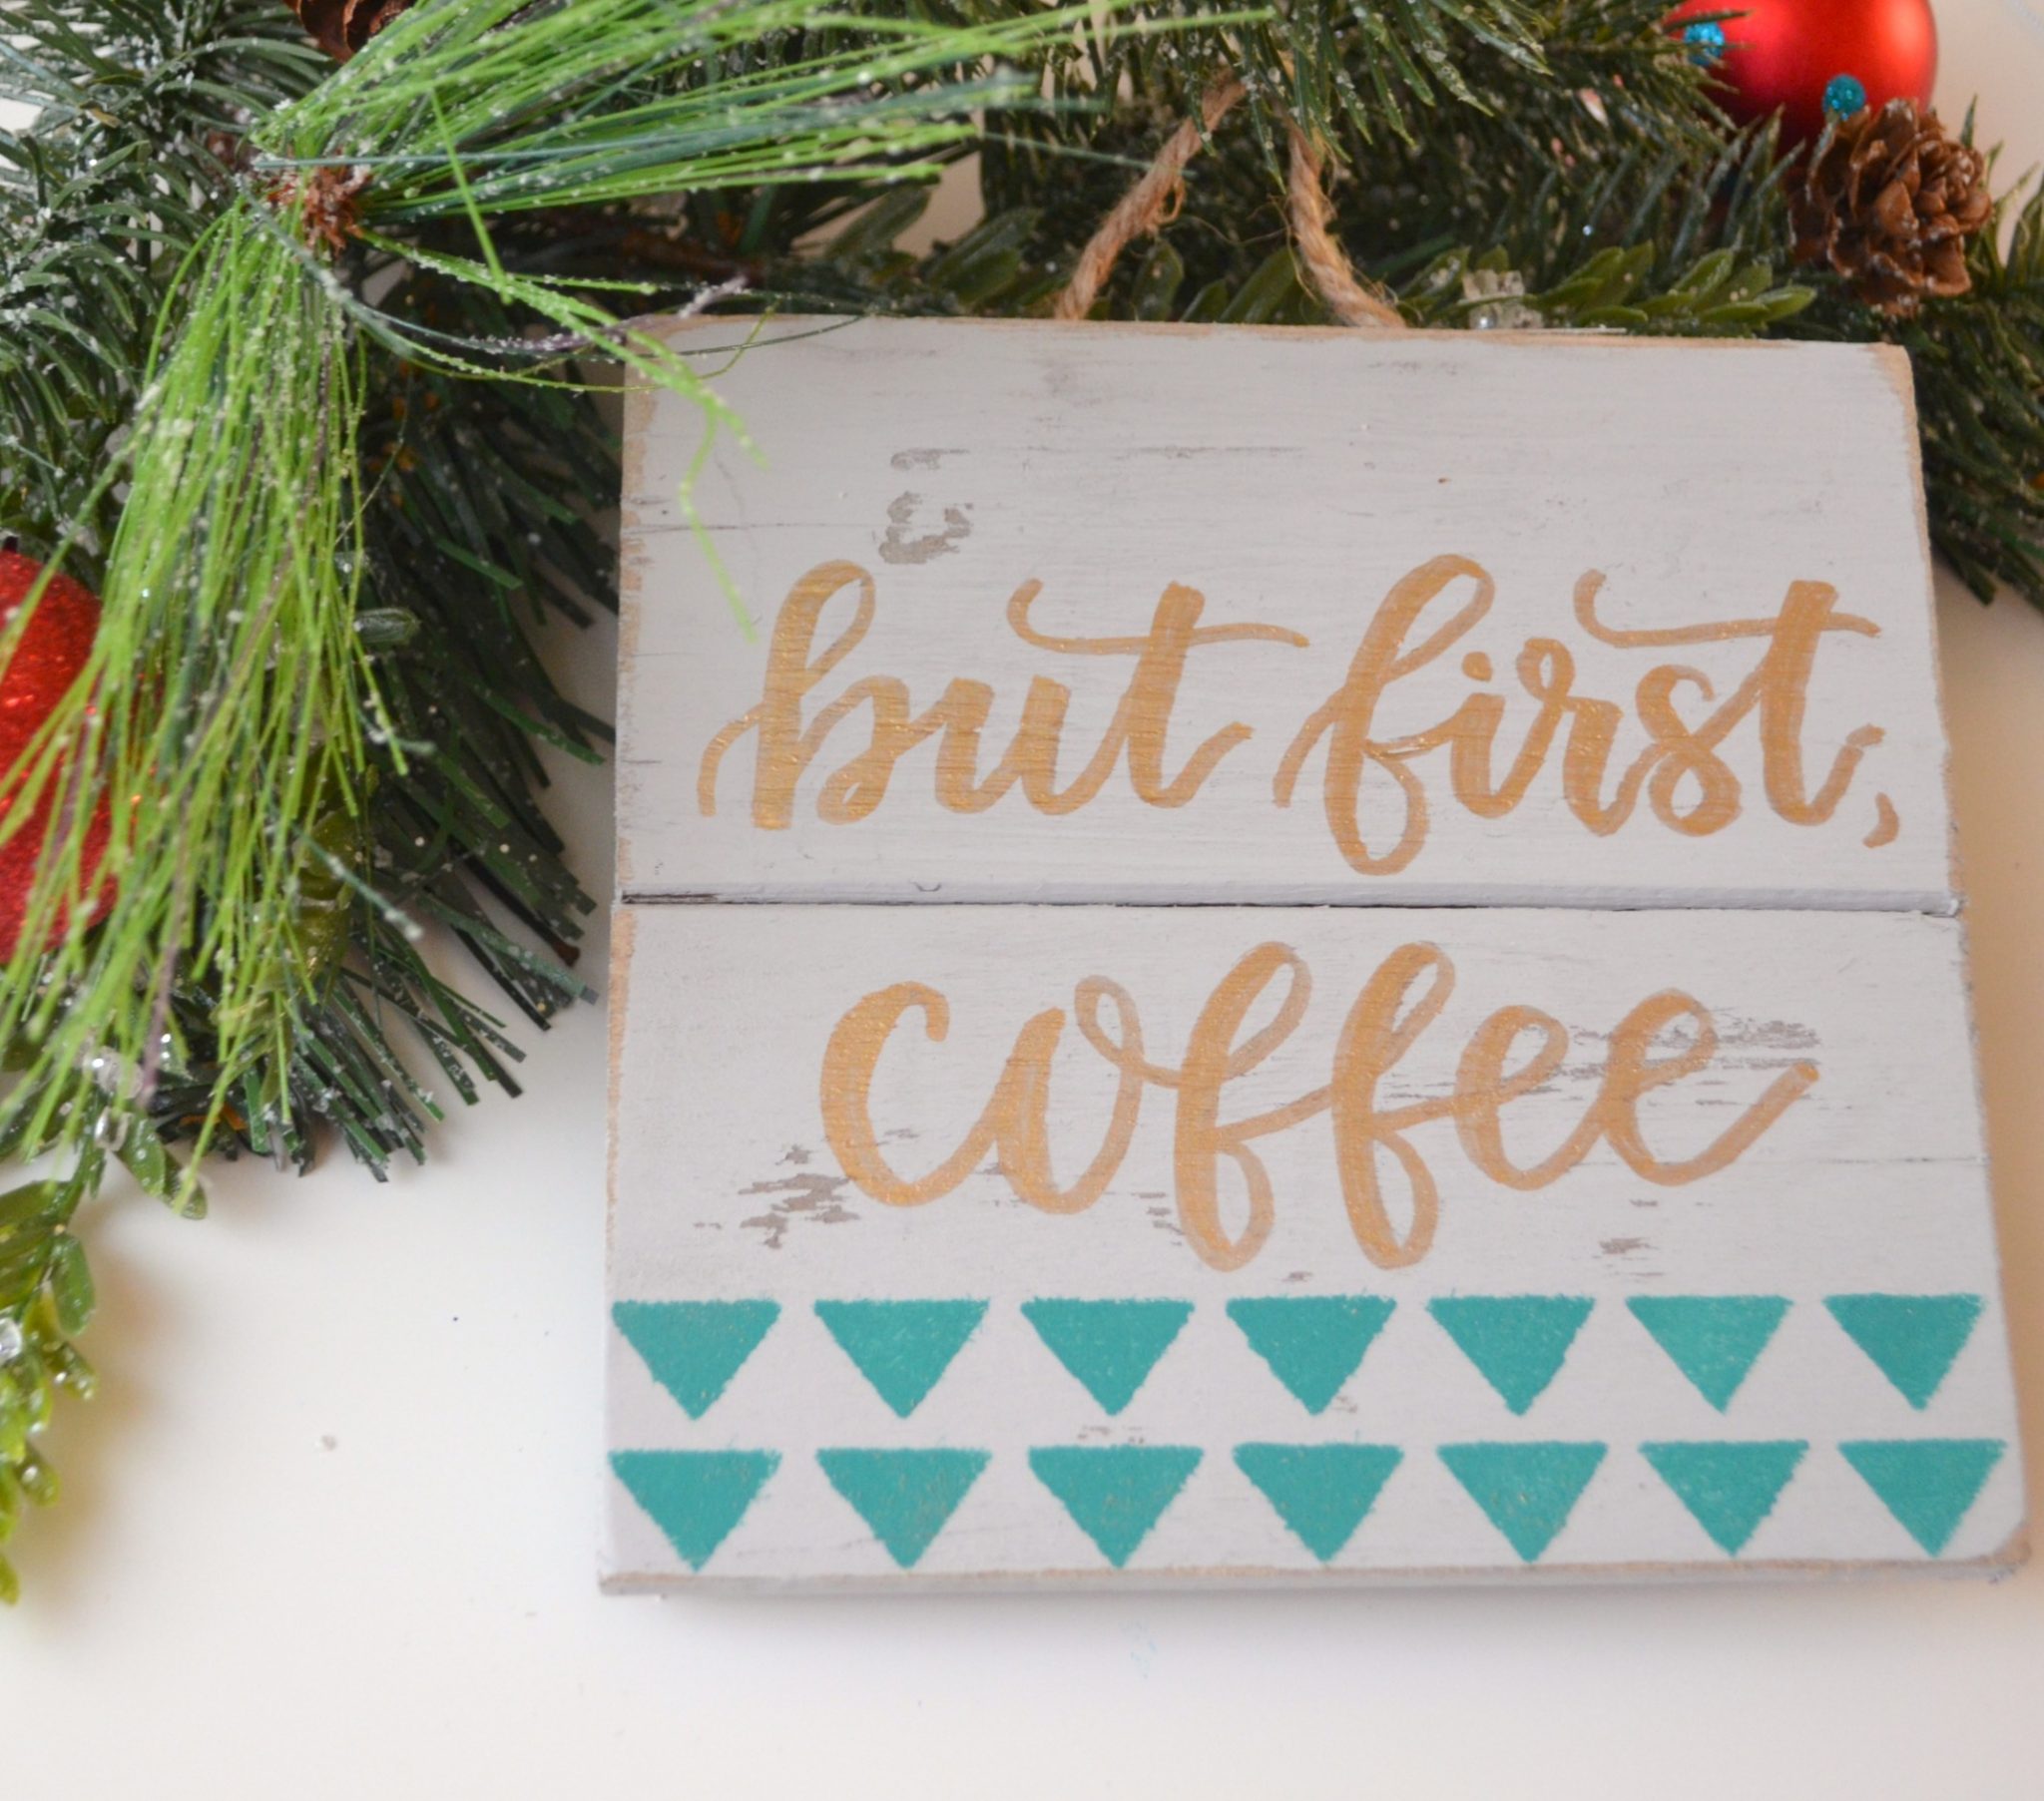
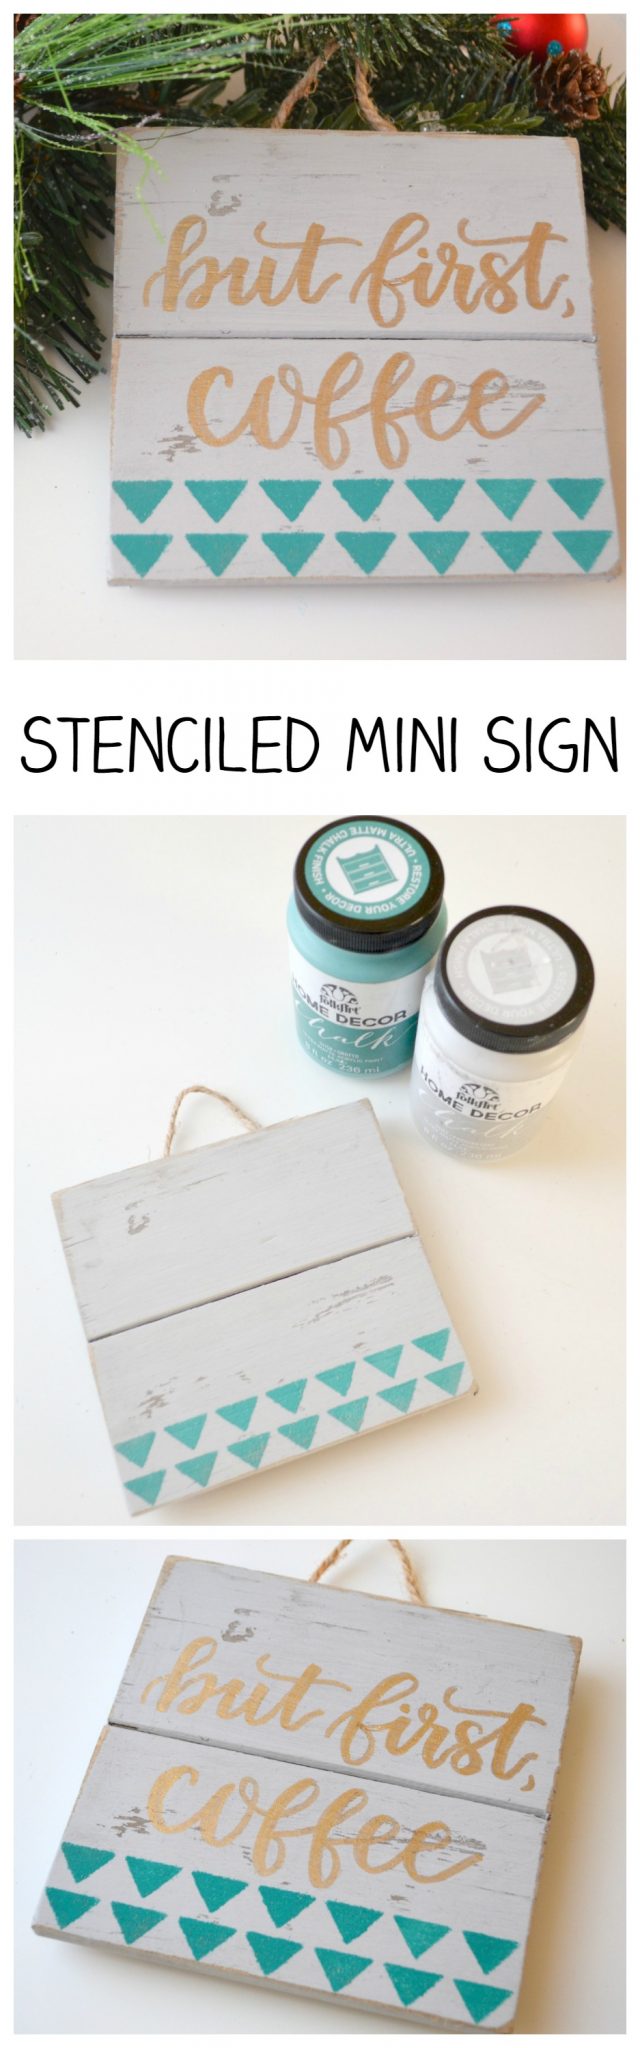
Step 1: Give your sign a base coat of FolkArt Home Decor Chalk in Parisian Grey.
This paint is available in more than 35 different colors, but I’d have to say Parisian Grey is my favorite of the neutrals. I’ve used it to paint several pieces of furniture in my home, and it always gives such a gorgeous, understated ultra matte finish. One coat should be plenty for coverage even if you start with a dark sign like mine, plus keep in mind that we’re going to be distressing it. Make sure to let it dry completely before moving on.

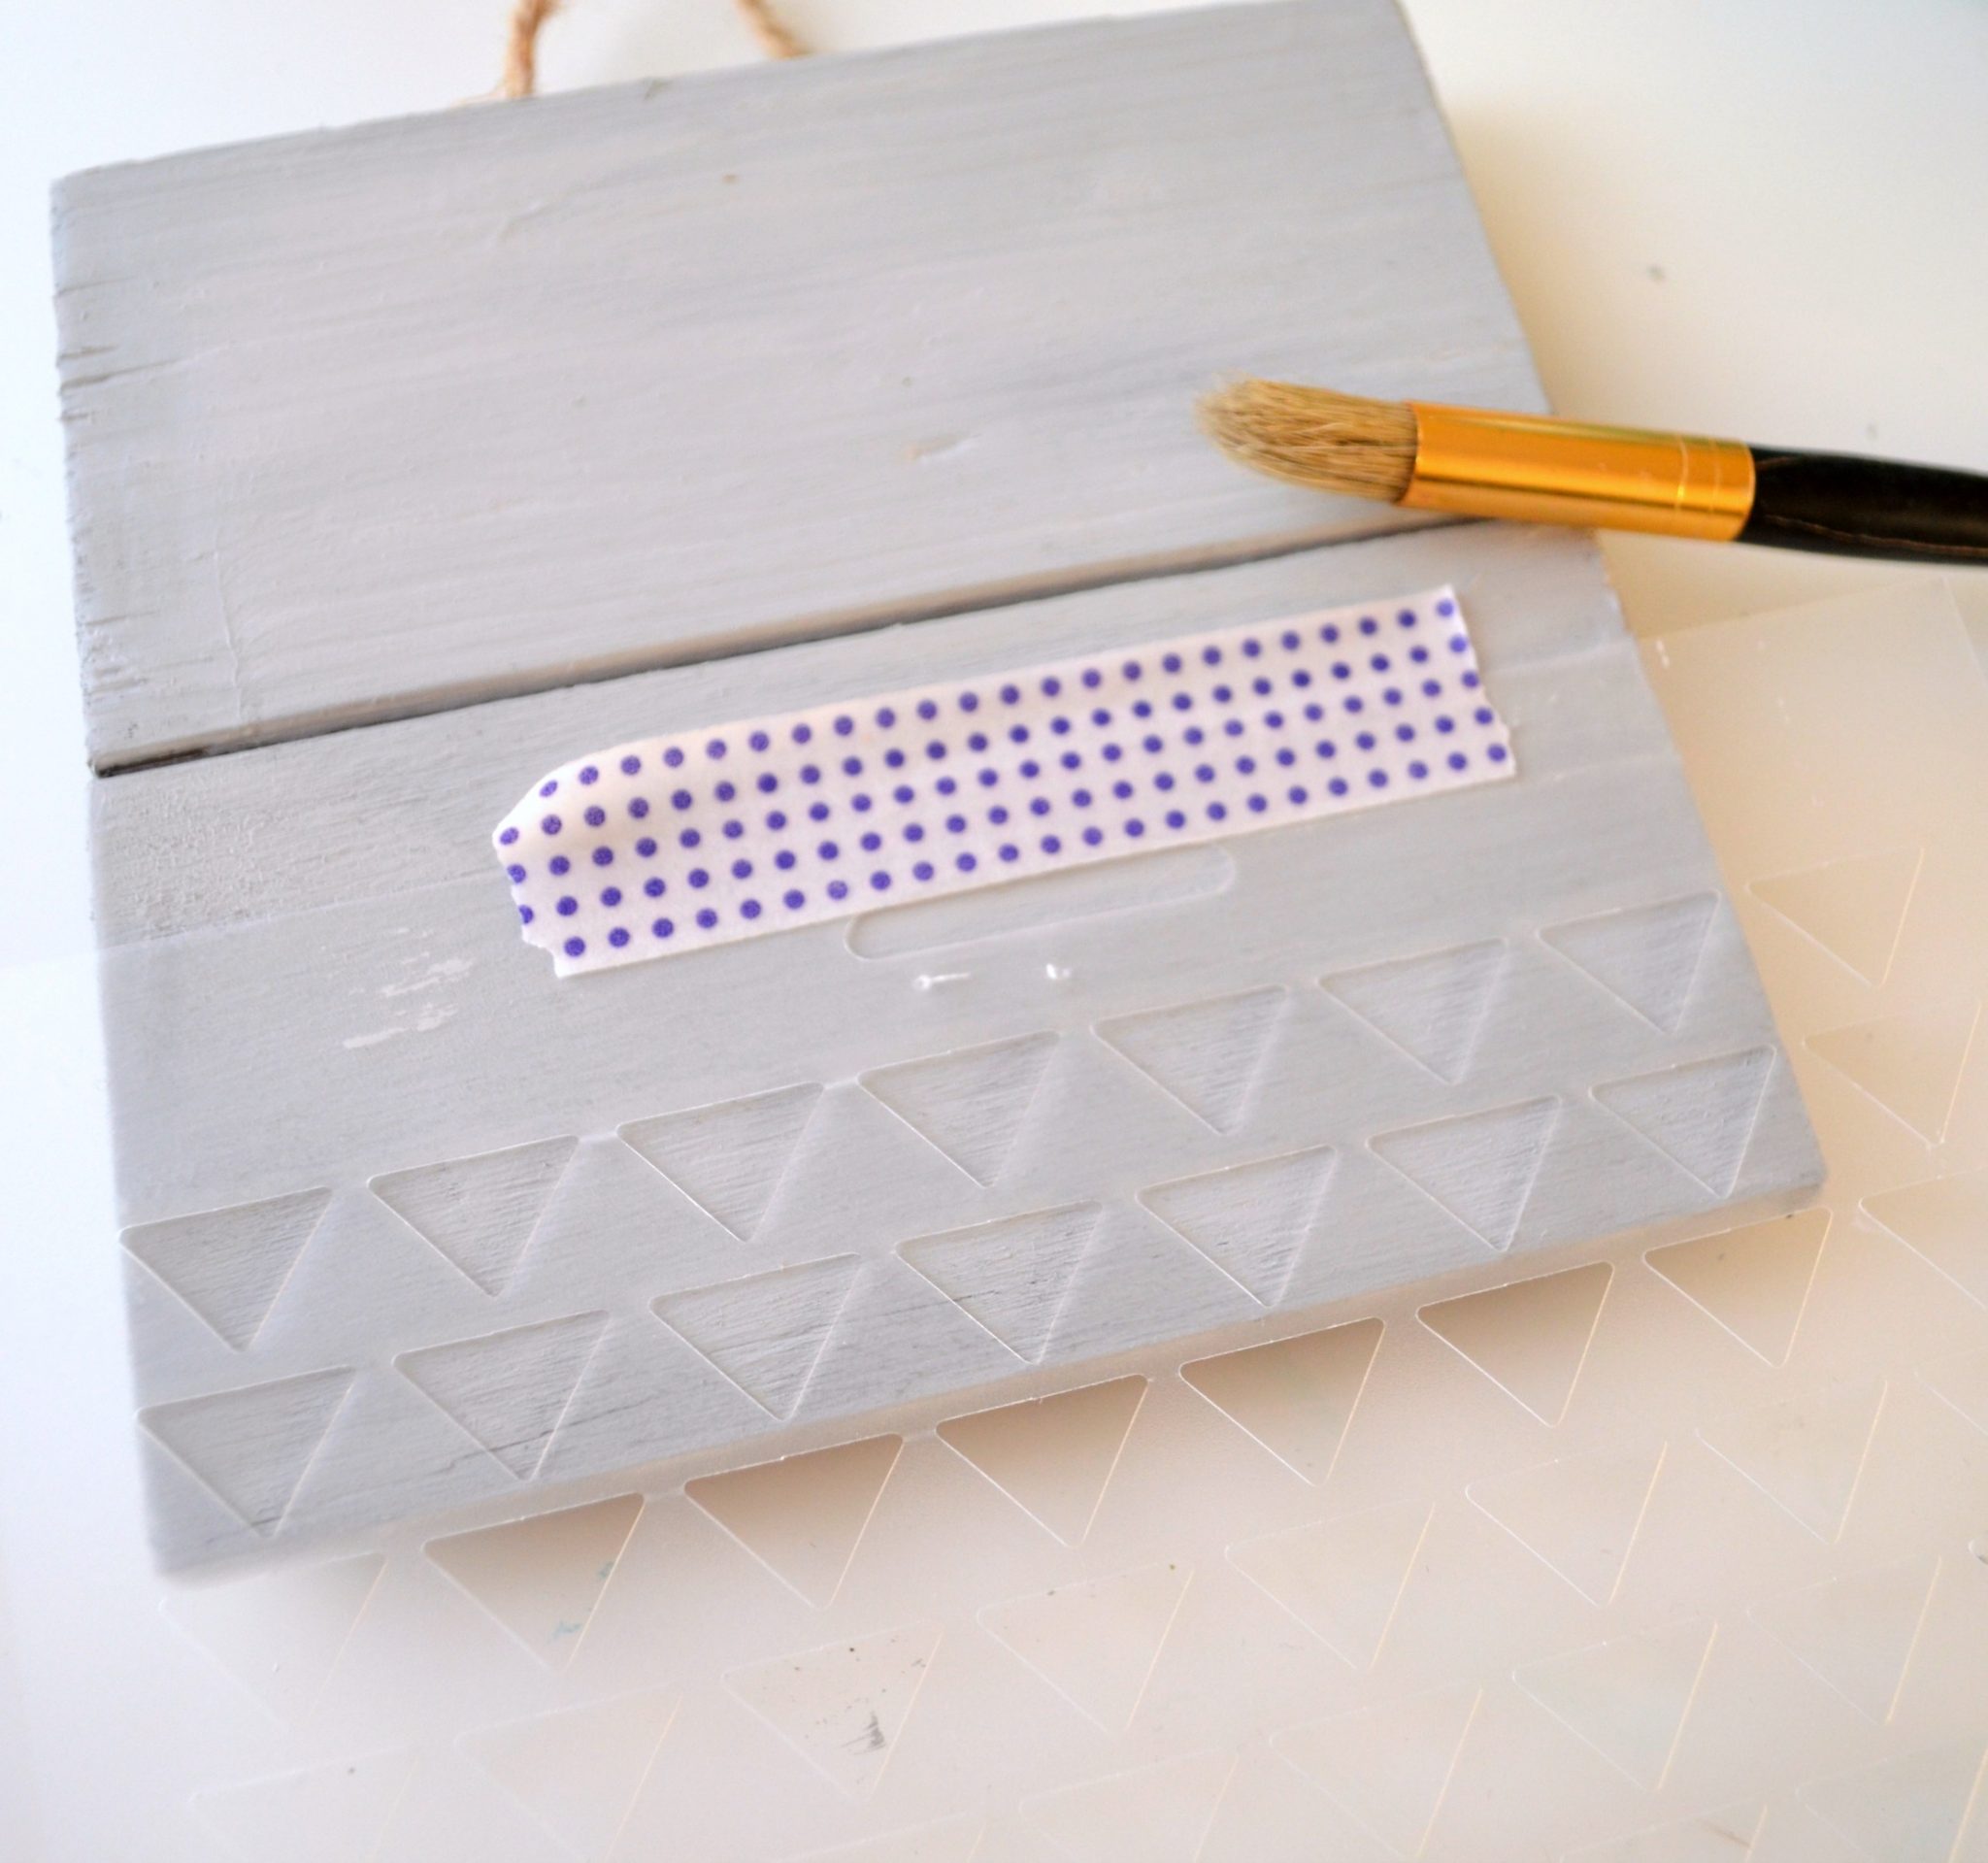
Step 2: Tape your stencil in place.
I chose the triangle pattern, but there are five other fun ones in the same pack you can use instead, including quatrefoil, chevron, and polka dots. I wanted to make sure I left enough room for my words, so I only stenciled two rows of the shapes across the bottom of my sign.
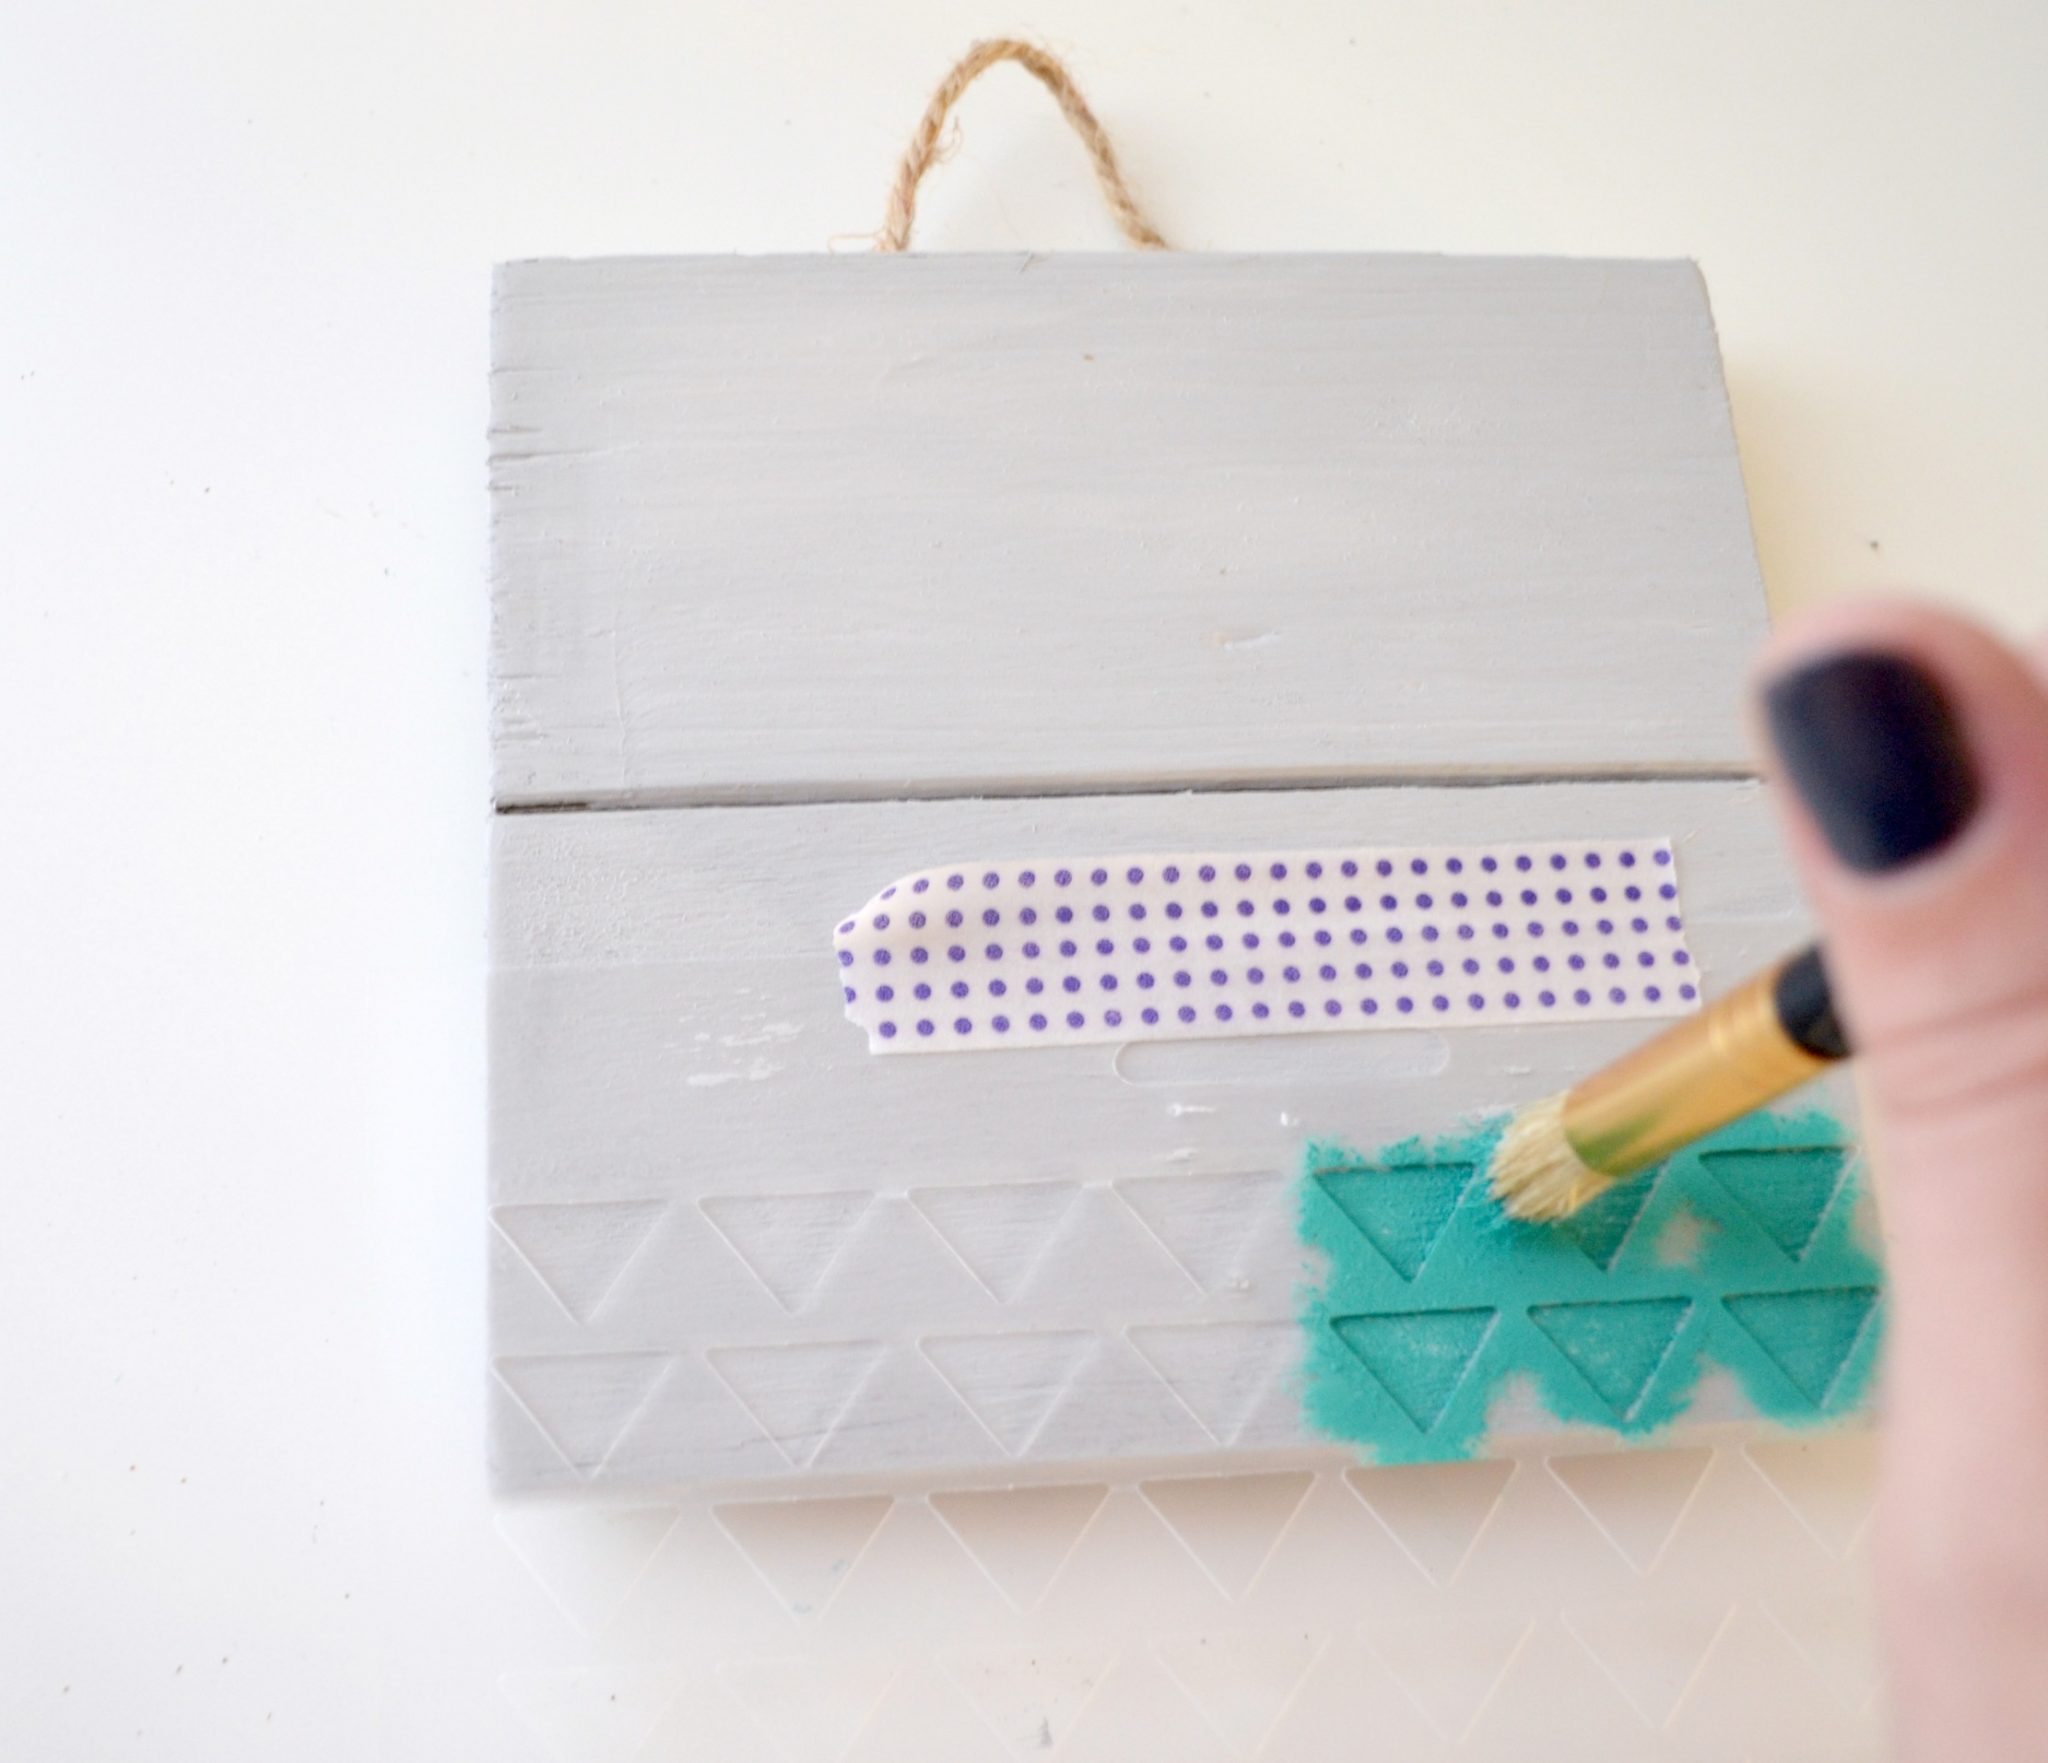
Step 3: Fill in the stencil with your favorite color of paint using a small stencil brush.
I chose FolkArt Home Decor Chalk in Grotto for this part because I love the vibrant color and thought it went really well with the grey base. Lots of folks find stenciling a clean image to be a challenge, but if you have the right tools and technique, it’s actually easy peasy! First, be sure you use a stencil brush, not just any old paintbrush you have on hand. Second, remember that less is more when you stencil. Load your brush sparingly, then tap it onto a scrap paper to offload any excess paint. Tap the brush over the stencil in an up and down motion, rather than rubbing it or using a typical painting stroke. It’s much better to reload your brush often than to use too much paint and have it bleed under the stencil, ruining your image!
Step 4: Distress your sign.
Use sandpaper and/or a power sander to remove some of the paint from around the edges of your sign. You can also sand over the surface to pull up the paint in certain areas, giving the sign a naturally worn, aged look. How much or how little you distress is up to your personal style…some people prefer things heavily distressed, while others like to keep more of the paint in tact.
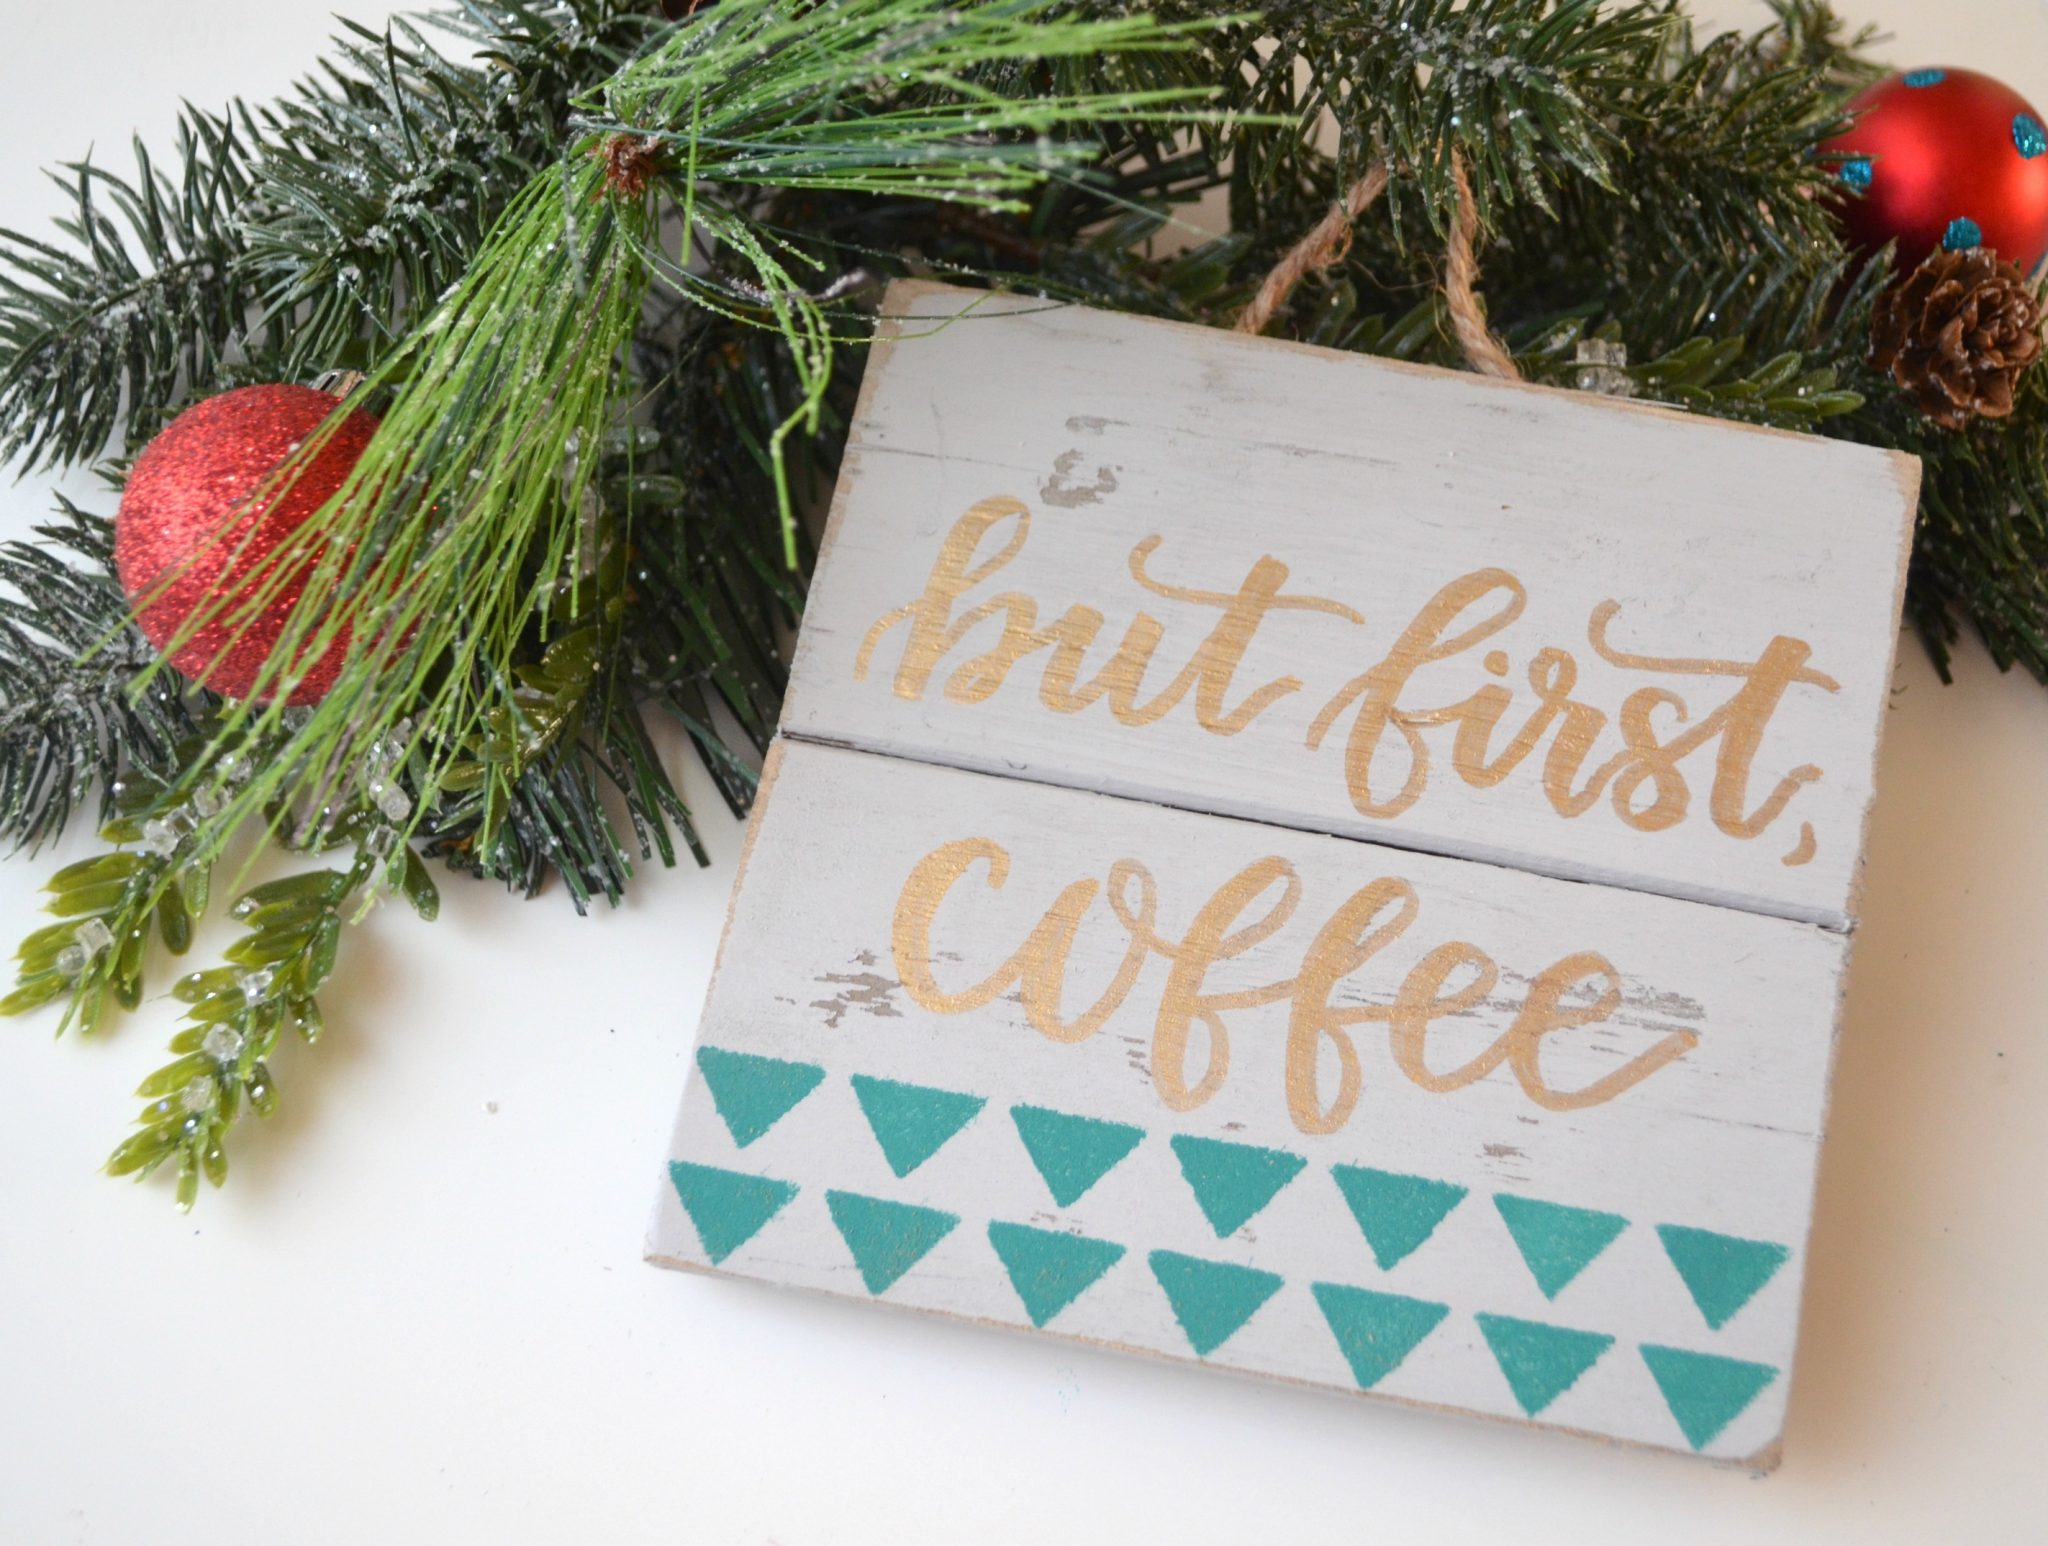
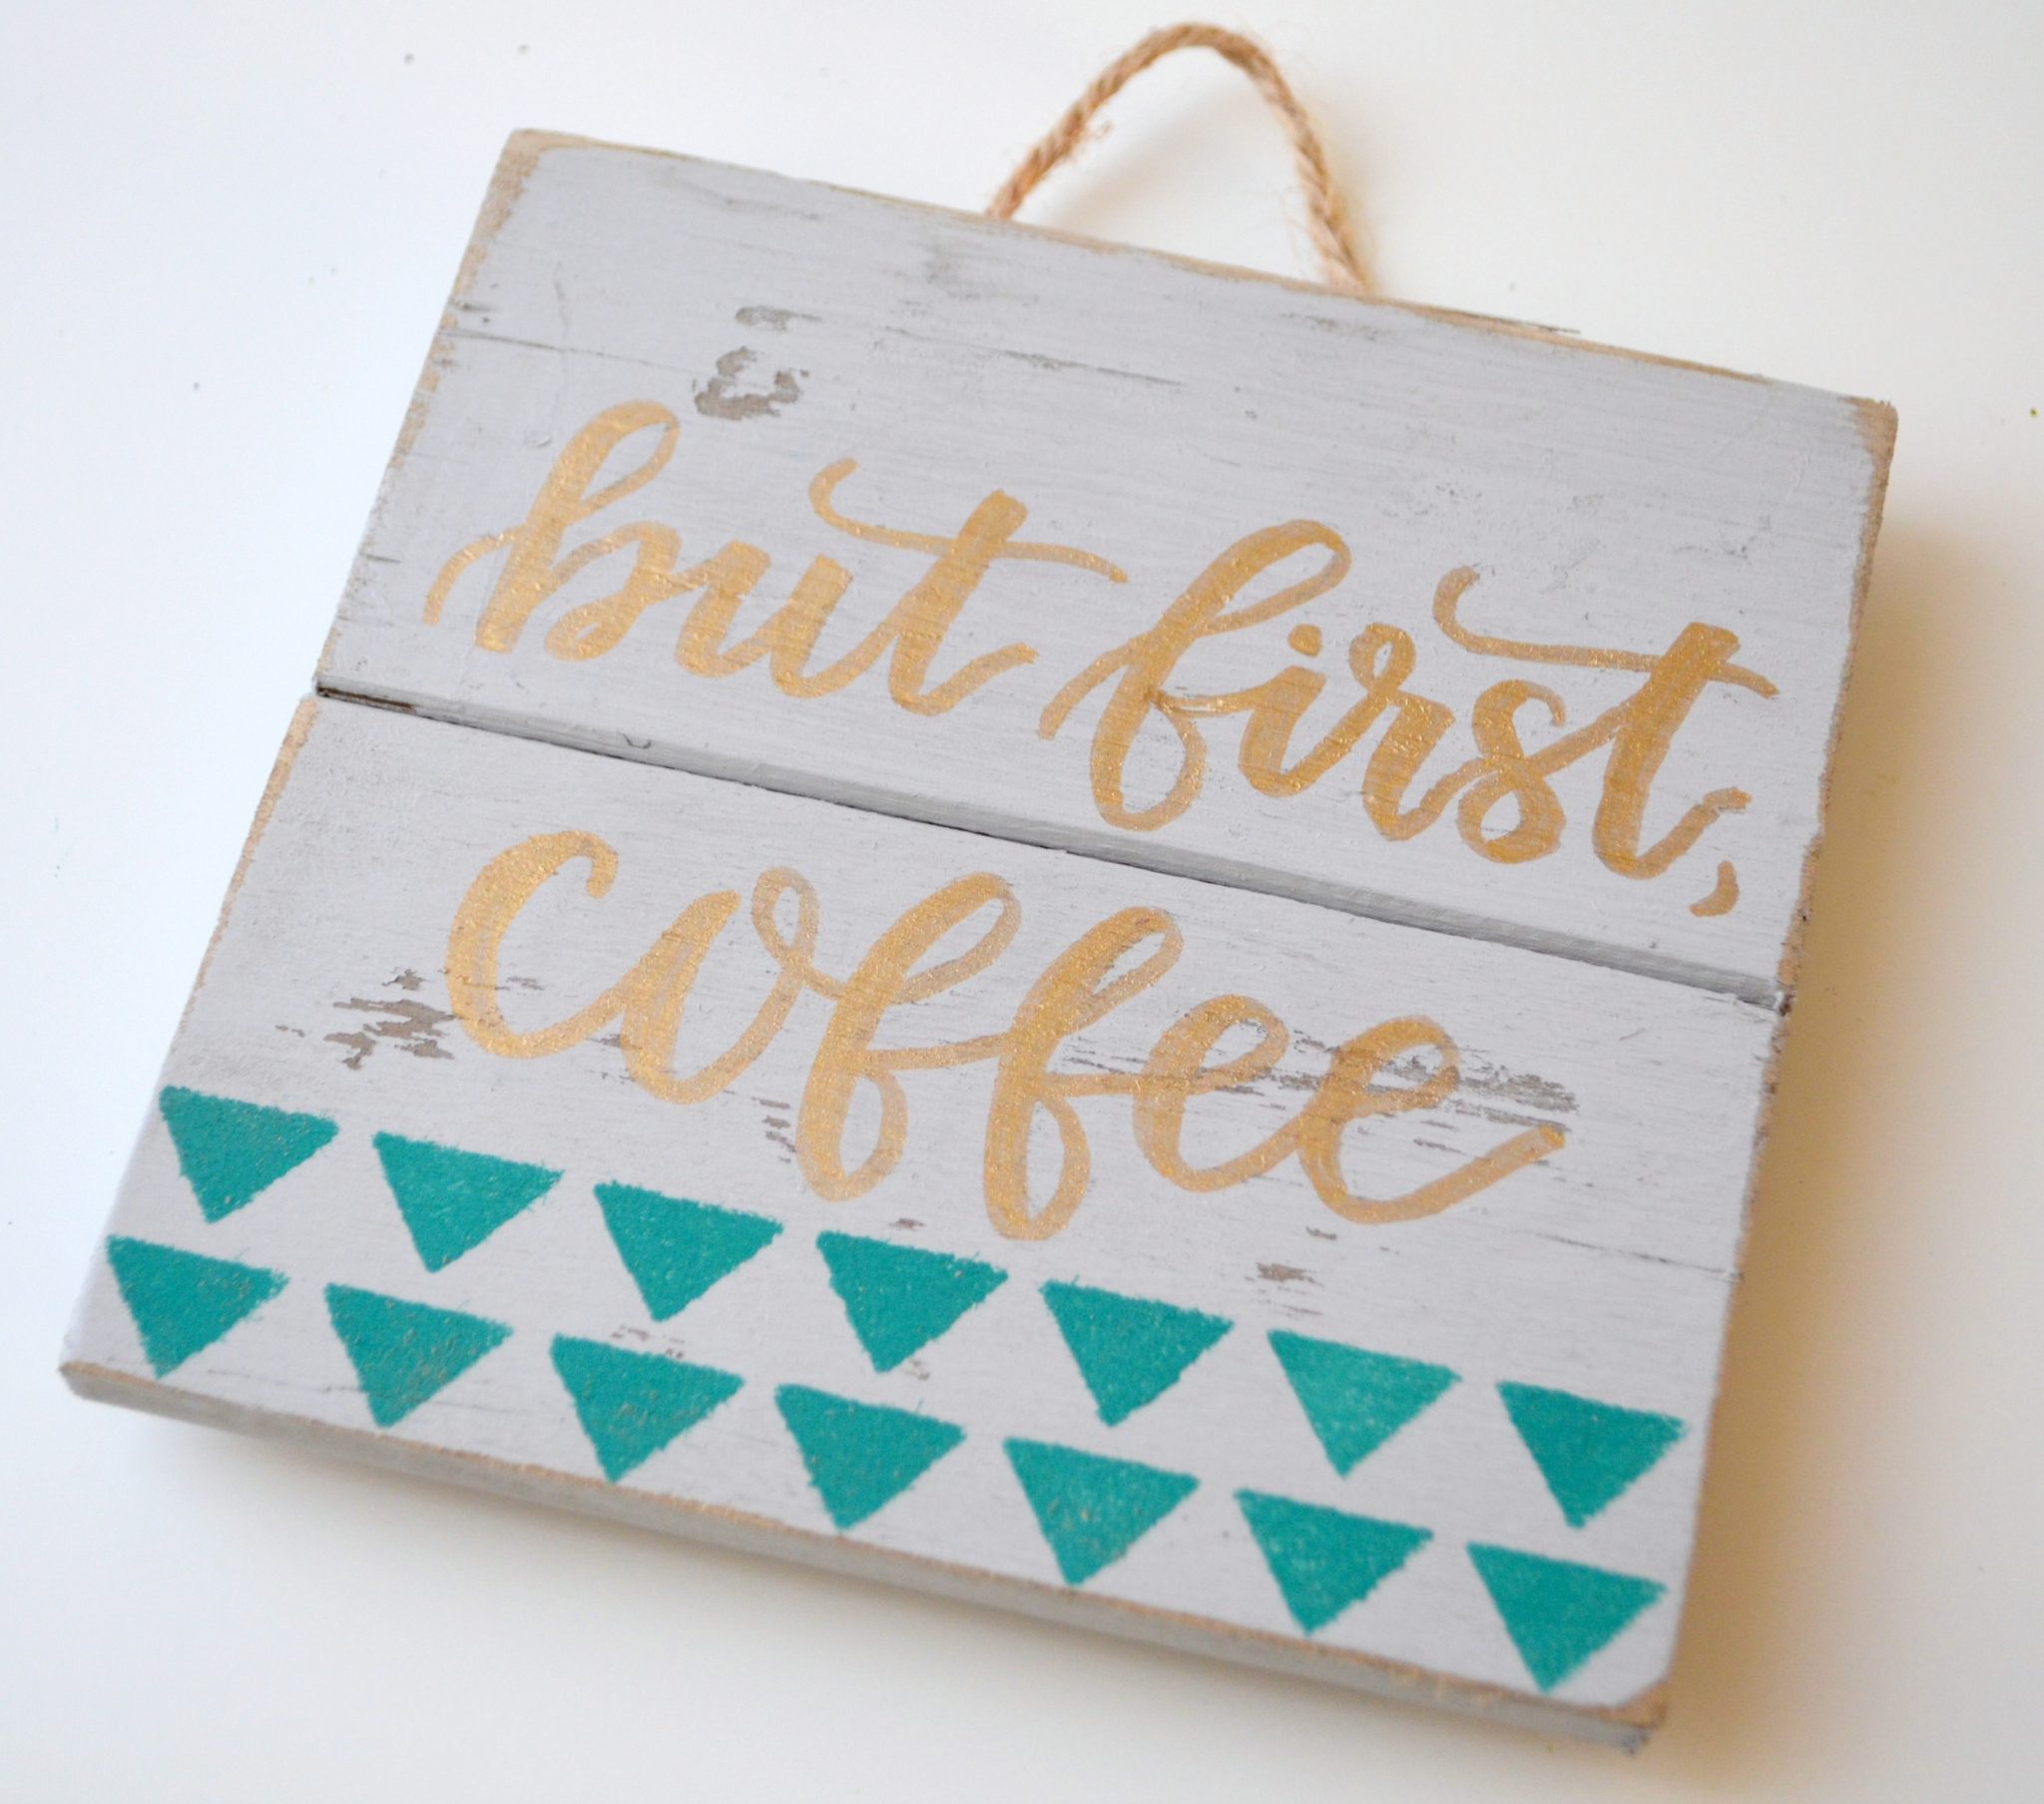
Step 5: Use a pencil to sketch your phrase.
I chose, “but first, coffee,” because the person I’m giving this sign to is a huge coffee nut! You can use any words or phrase you like, including someone’s name. This would make a cute teacher gift if you wrote his/her name and room number on it, don’t you think?
Step 6: Paint your letters using metallic paint and a liner brush.
Of course, you can use any color paint you like, but I loved the way the gold looked with the teal, and I’m pretty obsessed with shiny things right now. FolkArt Metallic paints come in a huge variety of shades {not just golds and silvers!} and have a beautiful sheen. They’re perfect for adding accents to your projects, particularly this time of year! When your lettering is finished, erase any pencil marks that are visible.
But wait. You might be wondering how in the world to do this kind of lettering! If so, check out my full photo tutorial for beginner hand lettering. It’s super-basic and shows how to do faux calligraphy in three easy steps. It’s so much easier than it looks! You also always have the option of using a stenciled message instead, but I definitely encourage you to give this a try!
It’s that simple, friends! With a few basic supplies and less than half an hour, you can create a personal and chic gift for anyone in your life! Friends, neighbors, teachers, bus drivers…anyone would love to receive this sweet little sign. Who on your list would enjoy a gift like this one?
For more holiday gifting inspiration and projects, be sure to follow Plaid on Facebook, Instagram, Pinterest, and their blog The Plaid Palette.
Also, be sure and check out these quick and easy gift ideas, created by some of my favorite bloggers: