
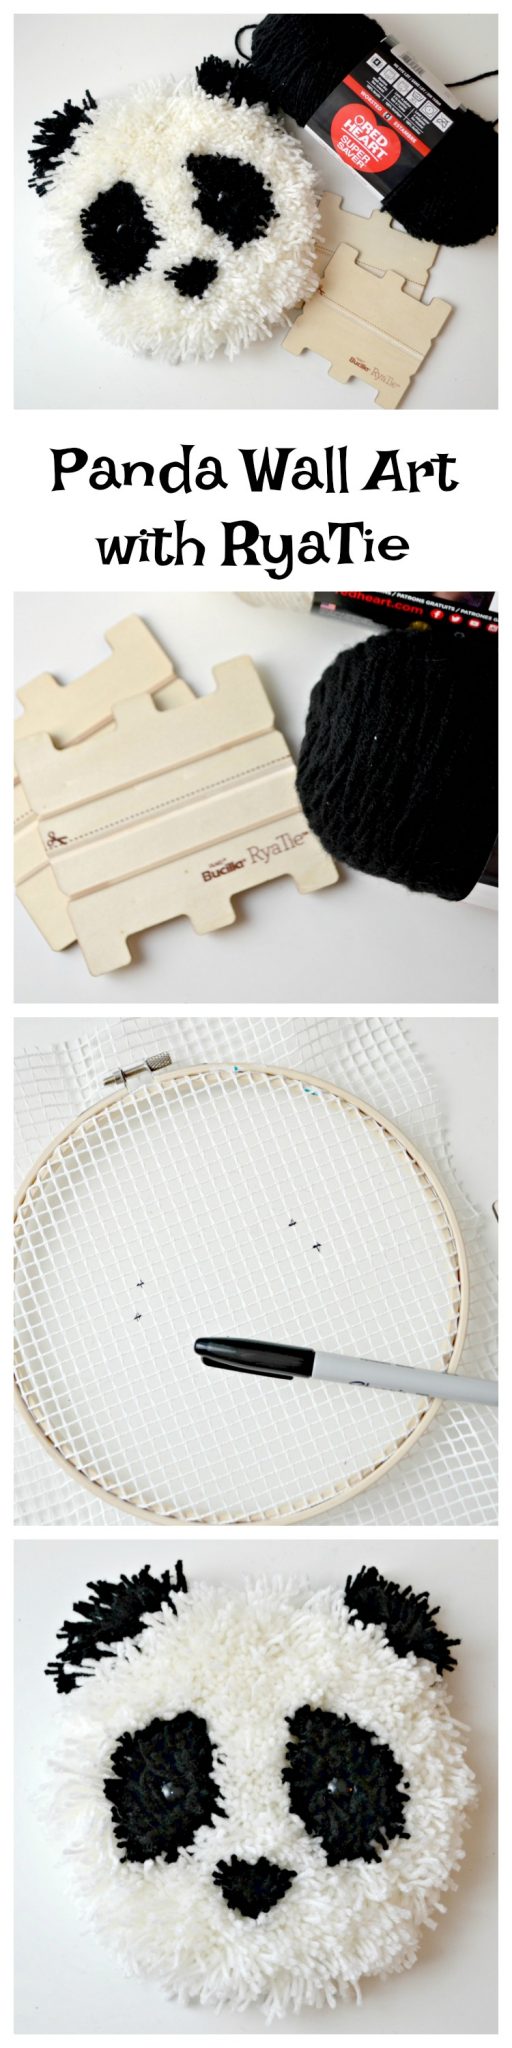
Panda Wall Hanging with Bucilla RyaTie
Thanks to Plaid Crafts for sponsoring today’s post. All opinions are honestly my own.
Many of you know that our family is preparing for a very special event this fall. We are excitedly waiting for the day when we get to travel to China to bring home a ten-year-old boy, “Scout,” to become part of our forever family. If you missed our adoption announcement, you may want to check it out and hear our story!
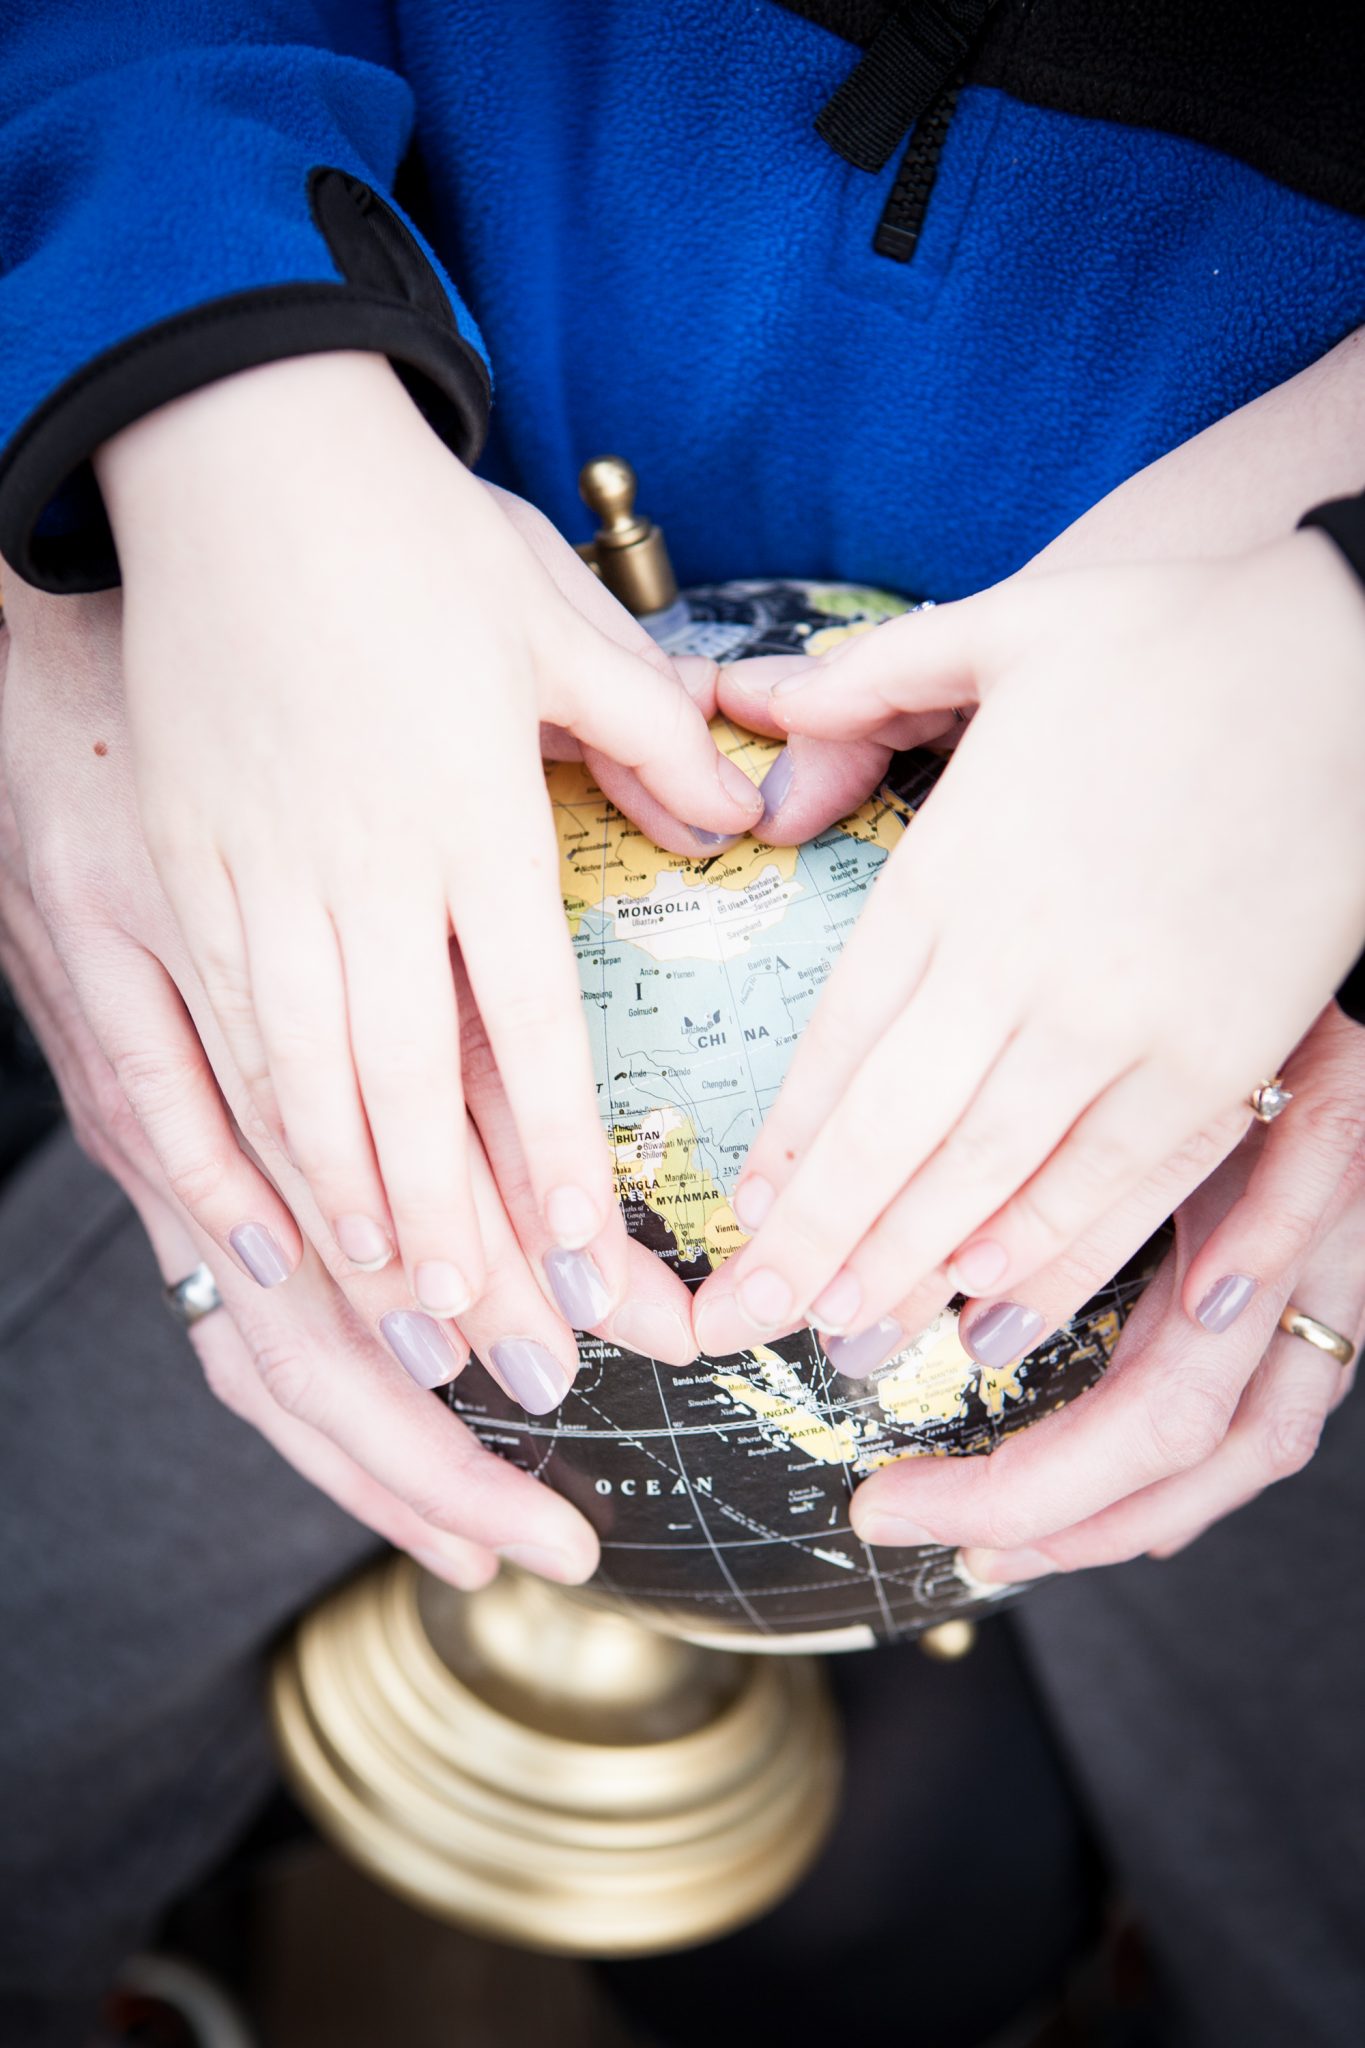
Our best case scenario will be to travel in early to mid-October, so until then, we’ve been busy trying to add a few things to our house that will make someone from China feel a little more at home. Little Crafter and I thought it would be fun to create a panda wall hanging for Scout’s room, so we grabbed some yarn from Walmart and the new RyaTie kit from Plaid and made it happen! Take a look…
We Used:
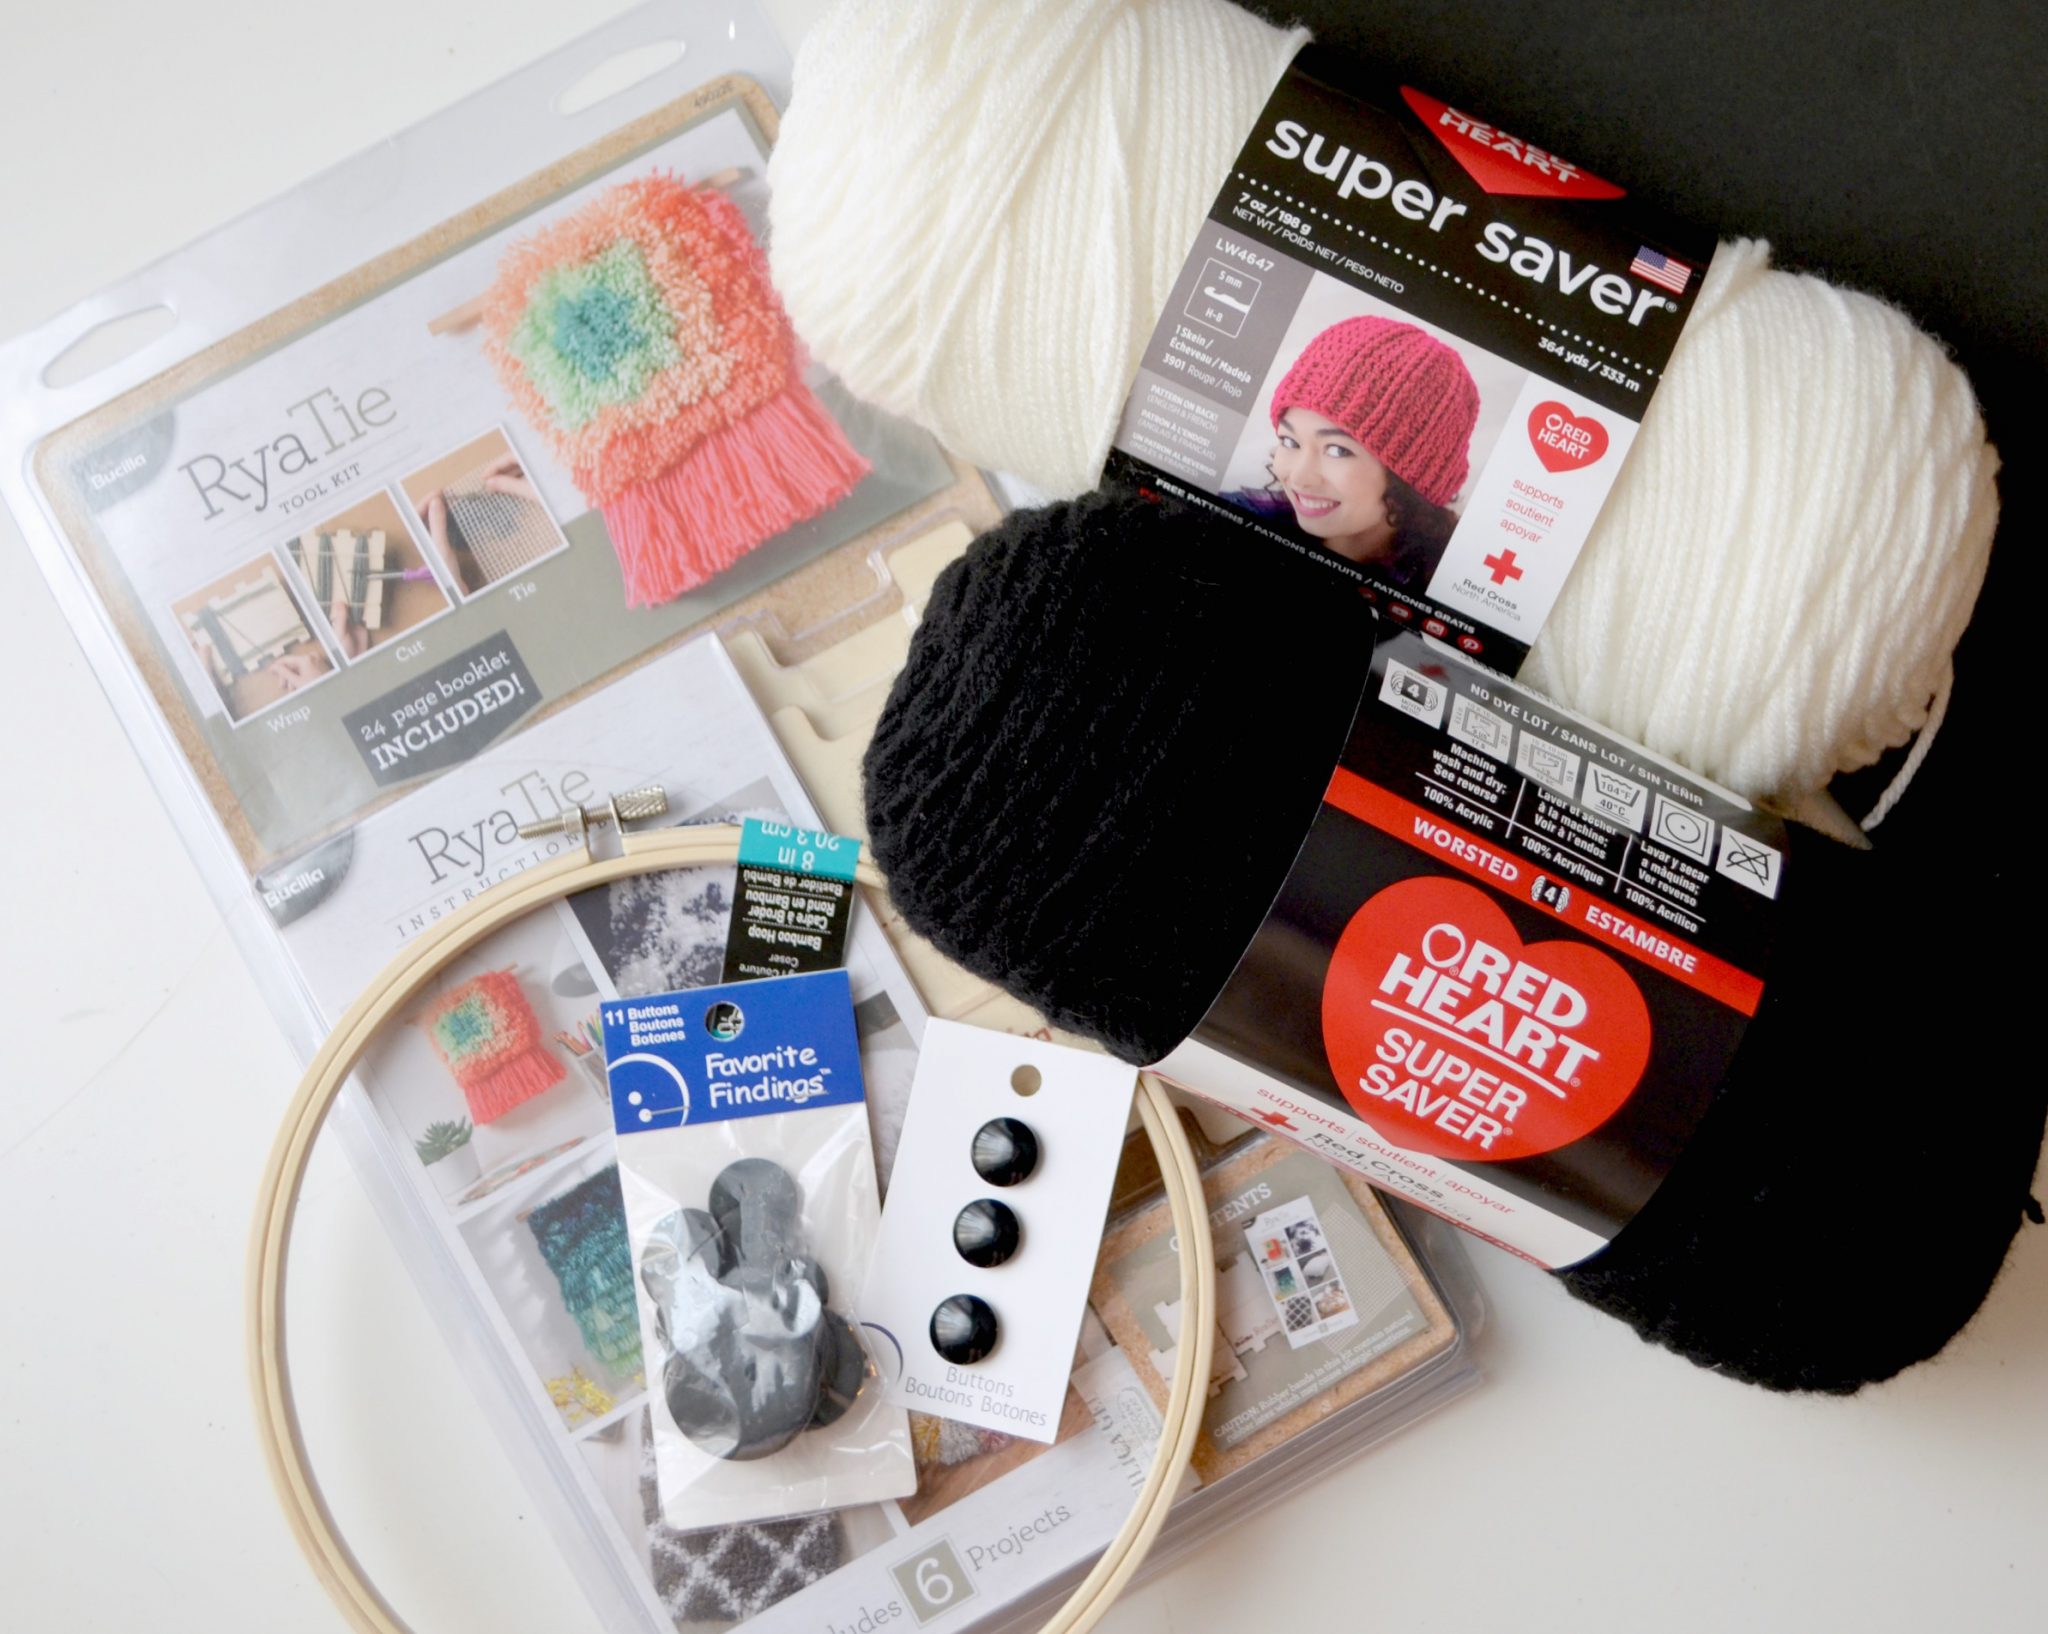
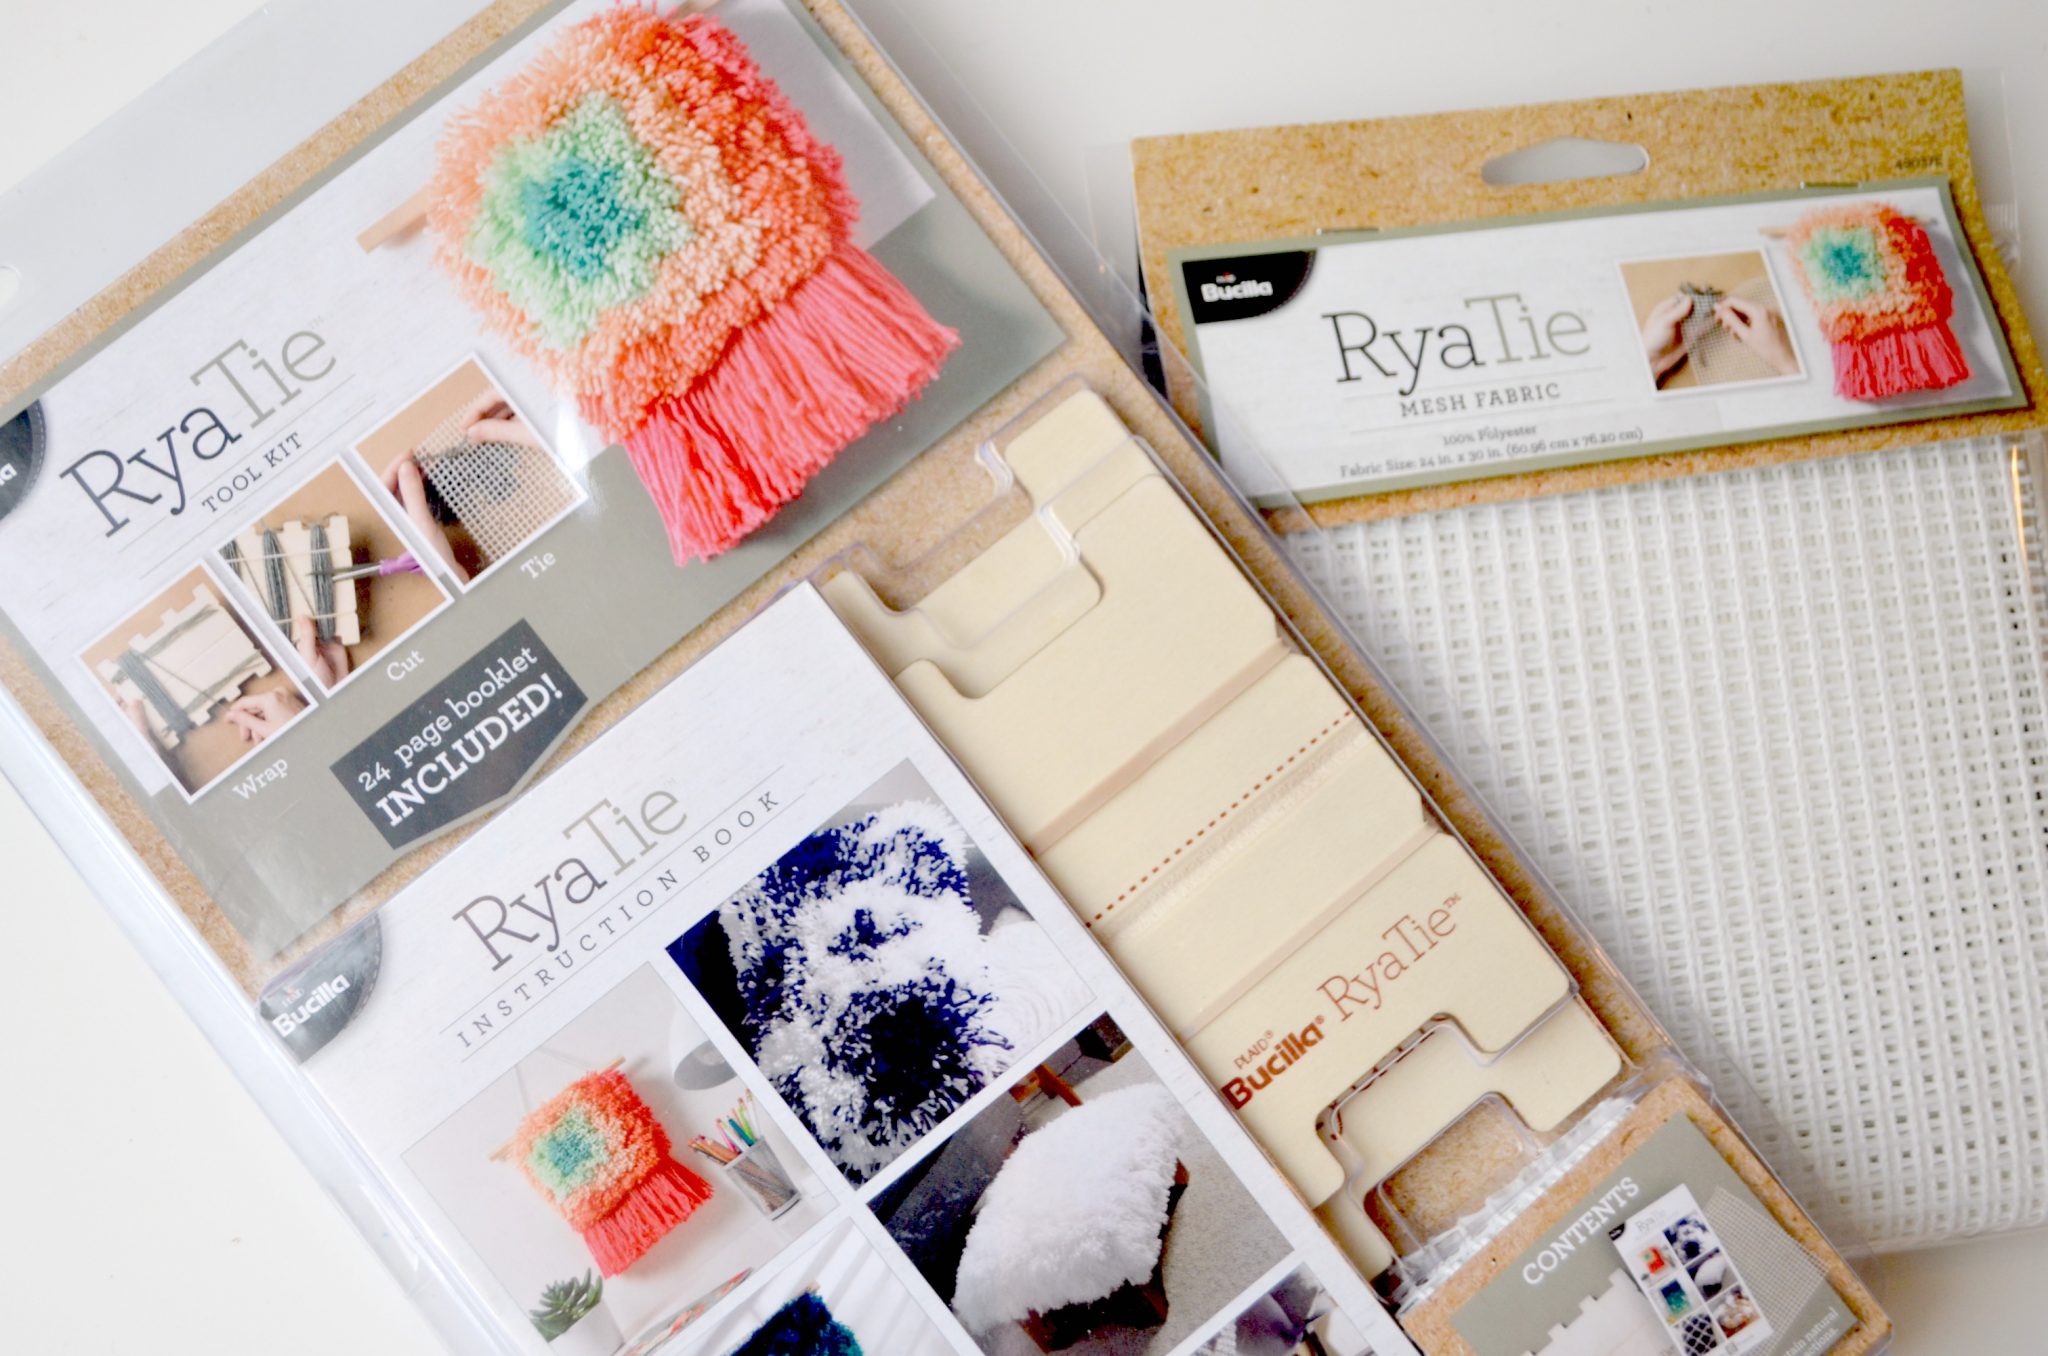
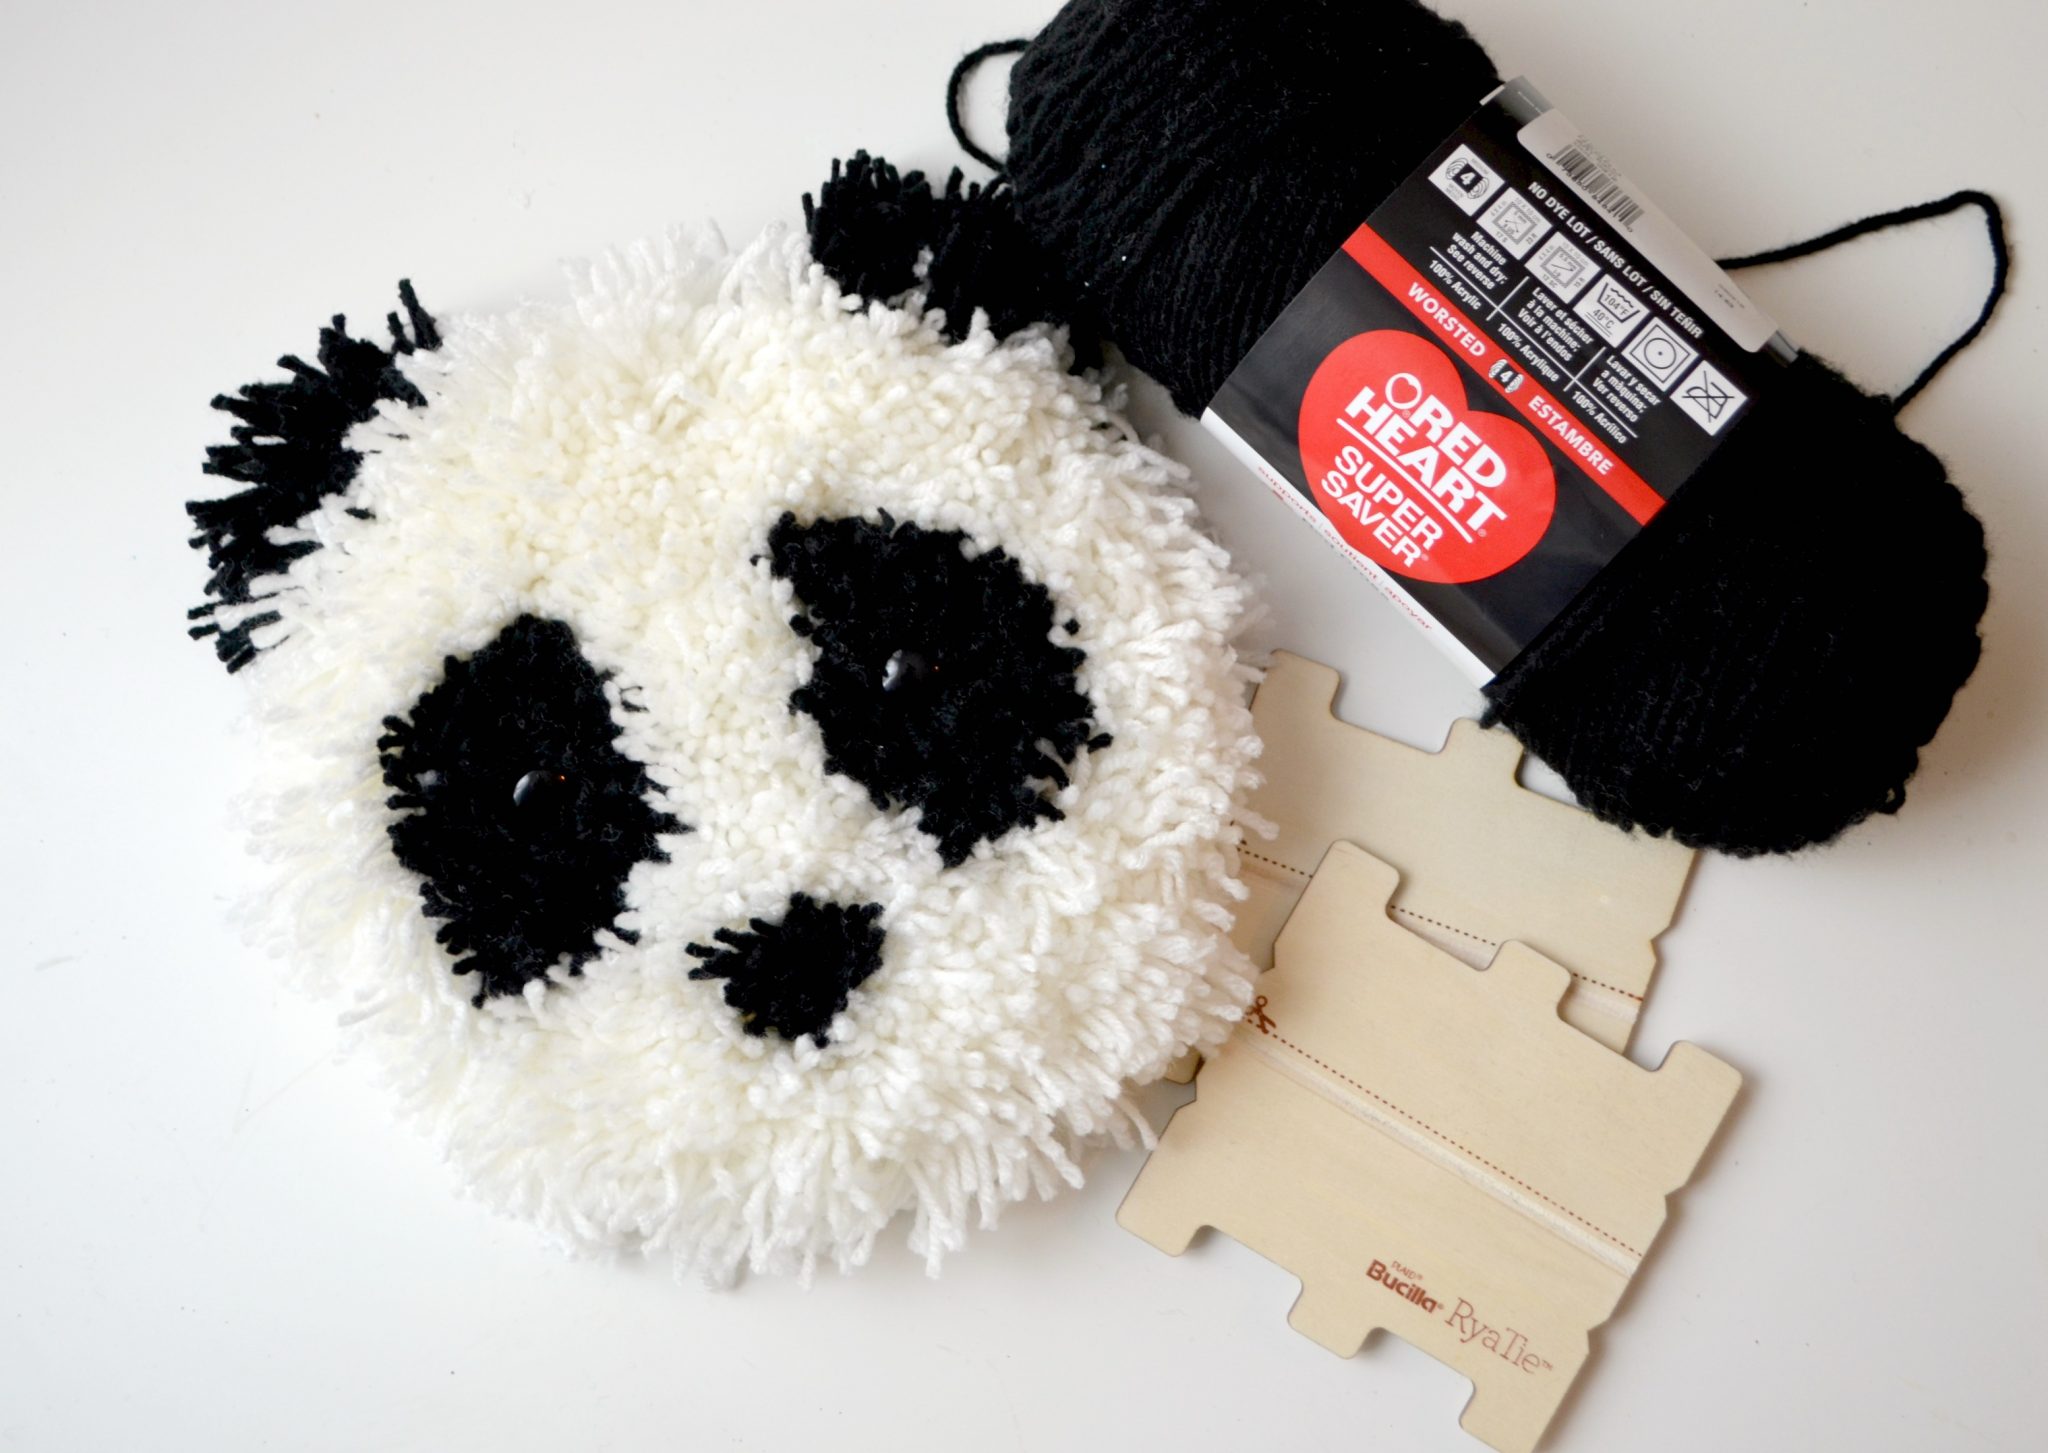
Bucilla RyaTie(TM) Tool Kit
Bucilla RyaTie Mesh Fabric
8″ Embroidery Hoop
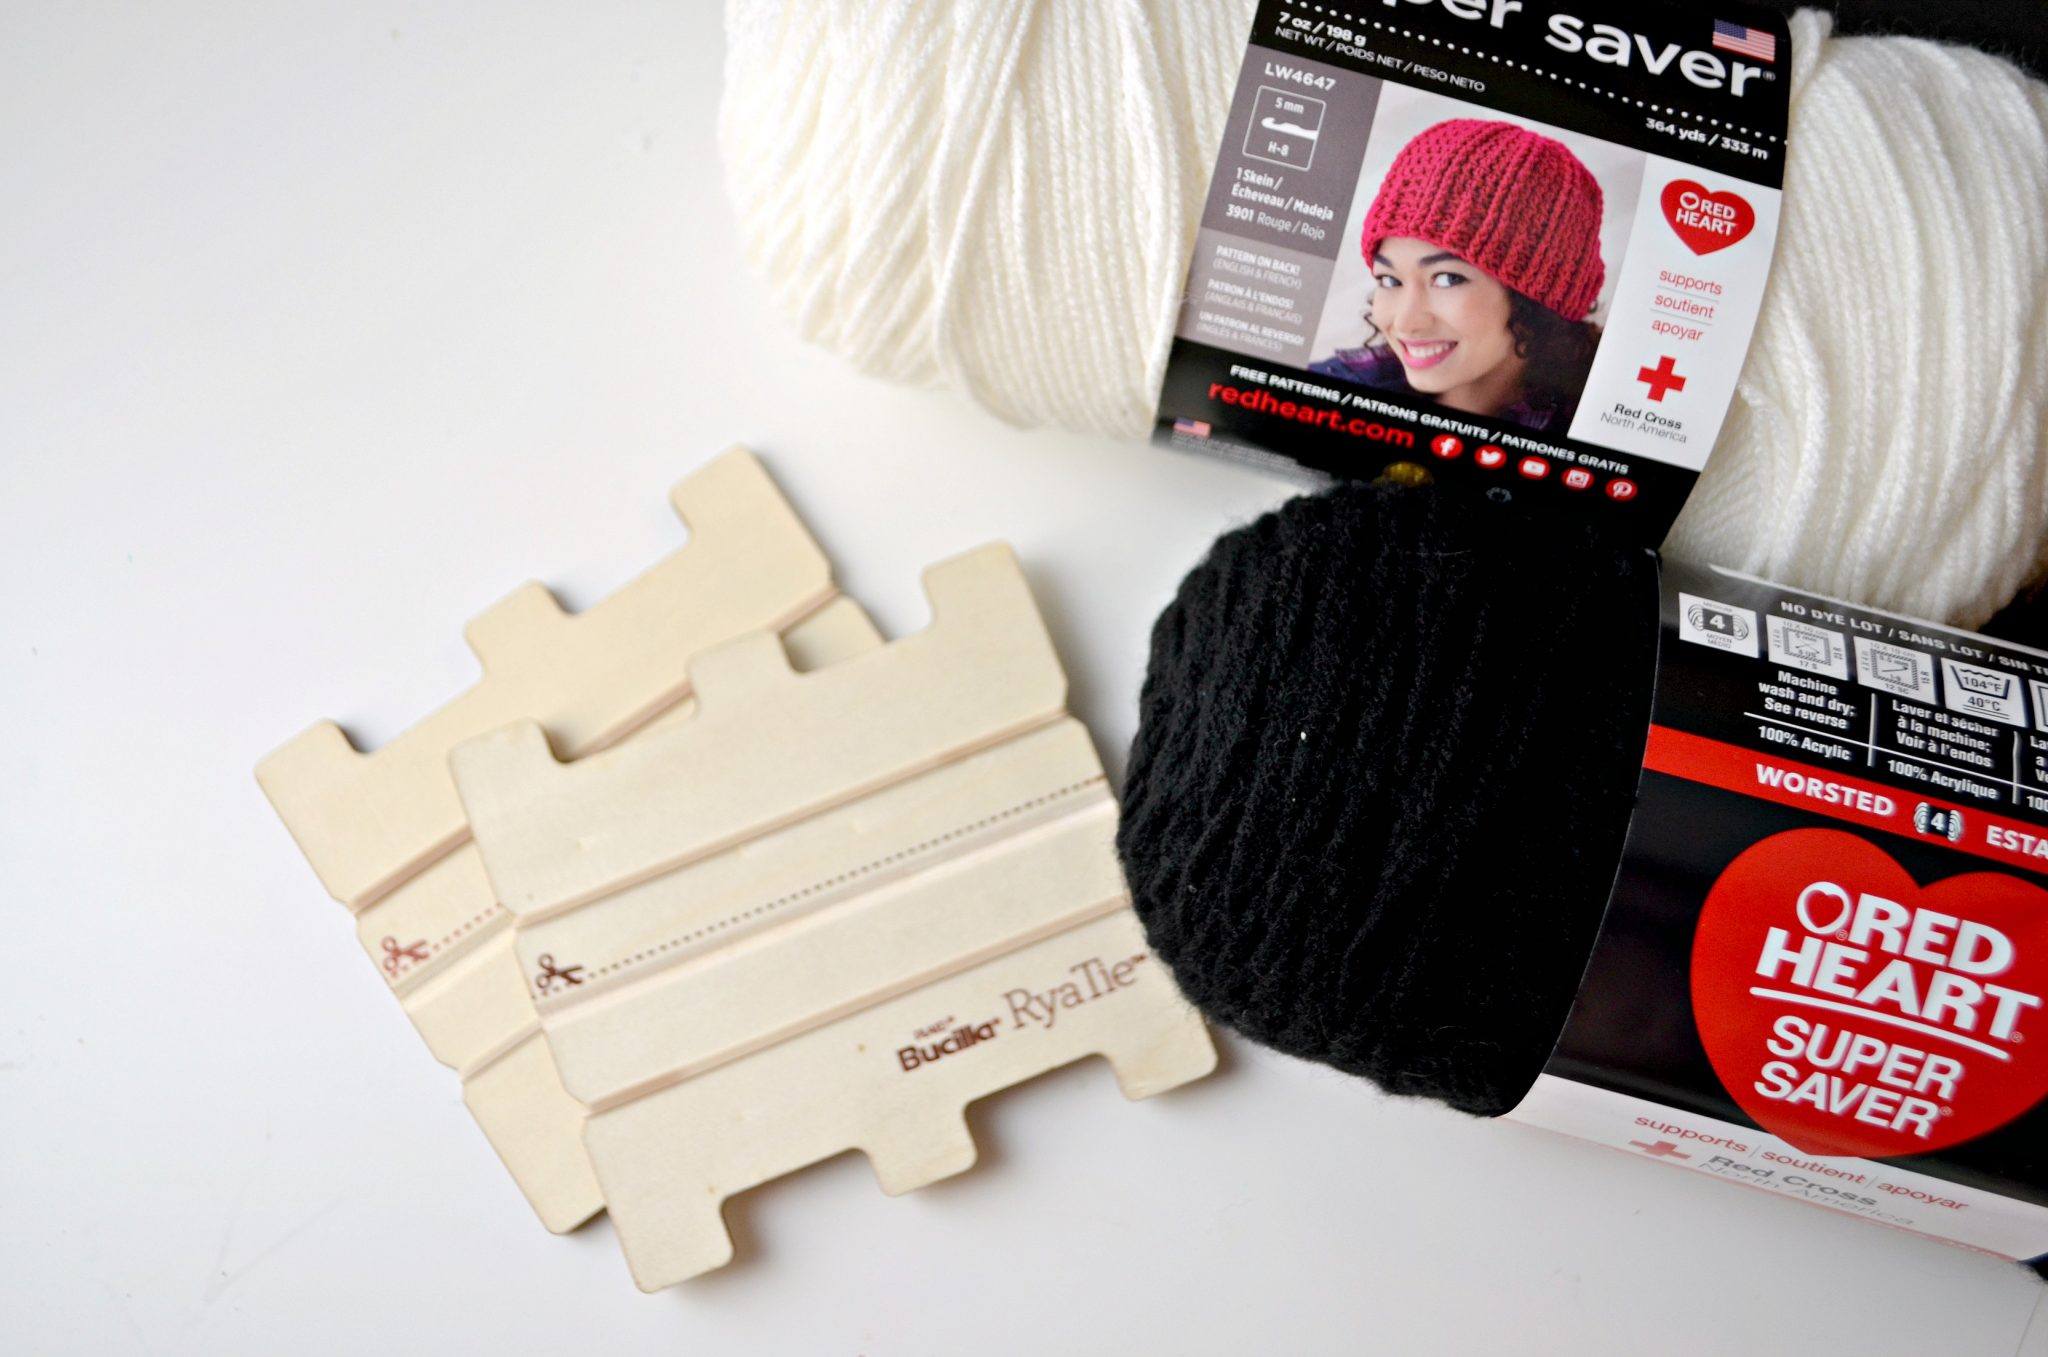
Red Heart Super Saver Worsted Yarn: Black and Soft White
Scissors
Buttons
Fabric Glue
So what in the world is RyaTie?
RyaTie is brand new from Bucilla this year. It’s a simple way to achieve the shaggy look of latch hook without all the work of tying each individual piece of yarn. Instead, you use a wooden tool to create yarn bundles that easily attach to a mesh canvas. You can quickly create a wall hanging, pillow, or rug without complicated tools; simply wrap, cut and tie. The RyaTie Set of 2 Tools includes both the small & large RyaTie tools as well as a 24 page instruction booklet featuring 6 projects to get you started. We used the small tool for our project, and since I have two of them, Little Crafter and I could work at the same time to make our yarn bundles.
Here’s how it works:
First, remove the rubber bands from the tool and set them aside. You’ll need them later in the process.
Step 1: Cut four pieces of yarn that are longer than the width of the tool and lay two across each of the little notches.
If you’re using the larger tool, you’ll cut six pieces and place three in each notch instead. In the end, these pieces of yarn are what you will be using to tie the bundles; each one will tie off one of the four bundles you create.
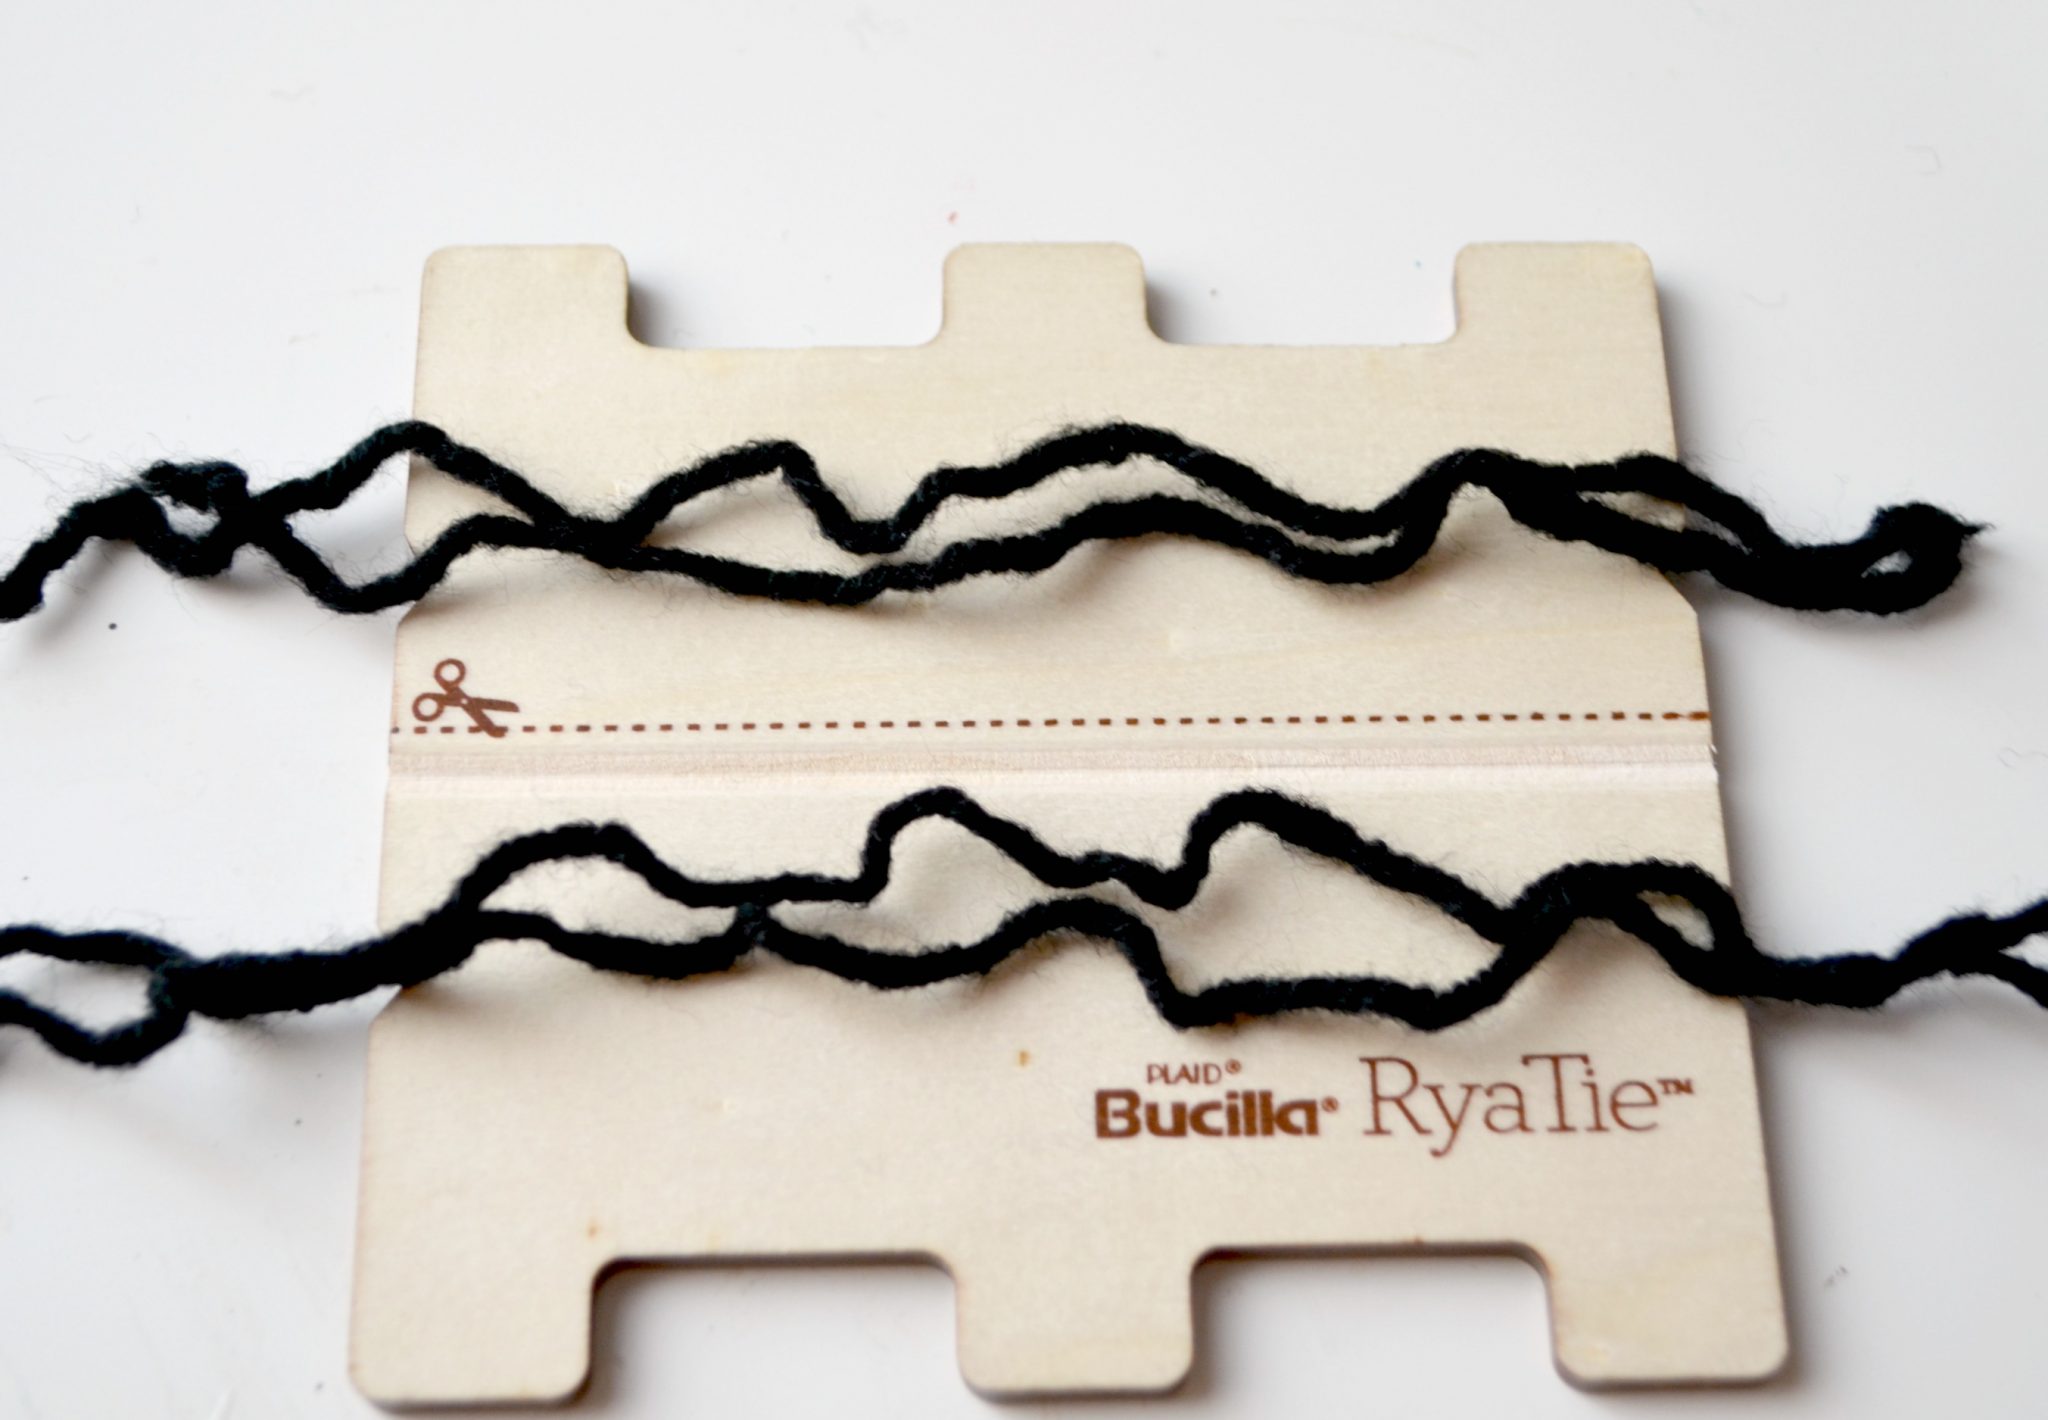
Step 2: Wrap yarn vertically around the tool, 24 times in each set of vertical notches.
Little Crafter loved this part and was able to do it pretty quickly, so even small hands can be a big help! He made at least half of the bundles we used for this project, if not more.
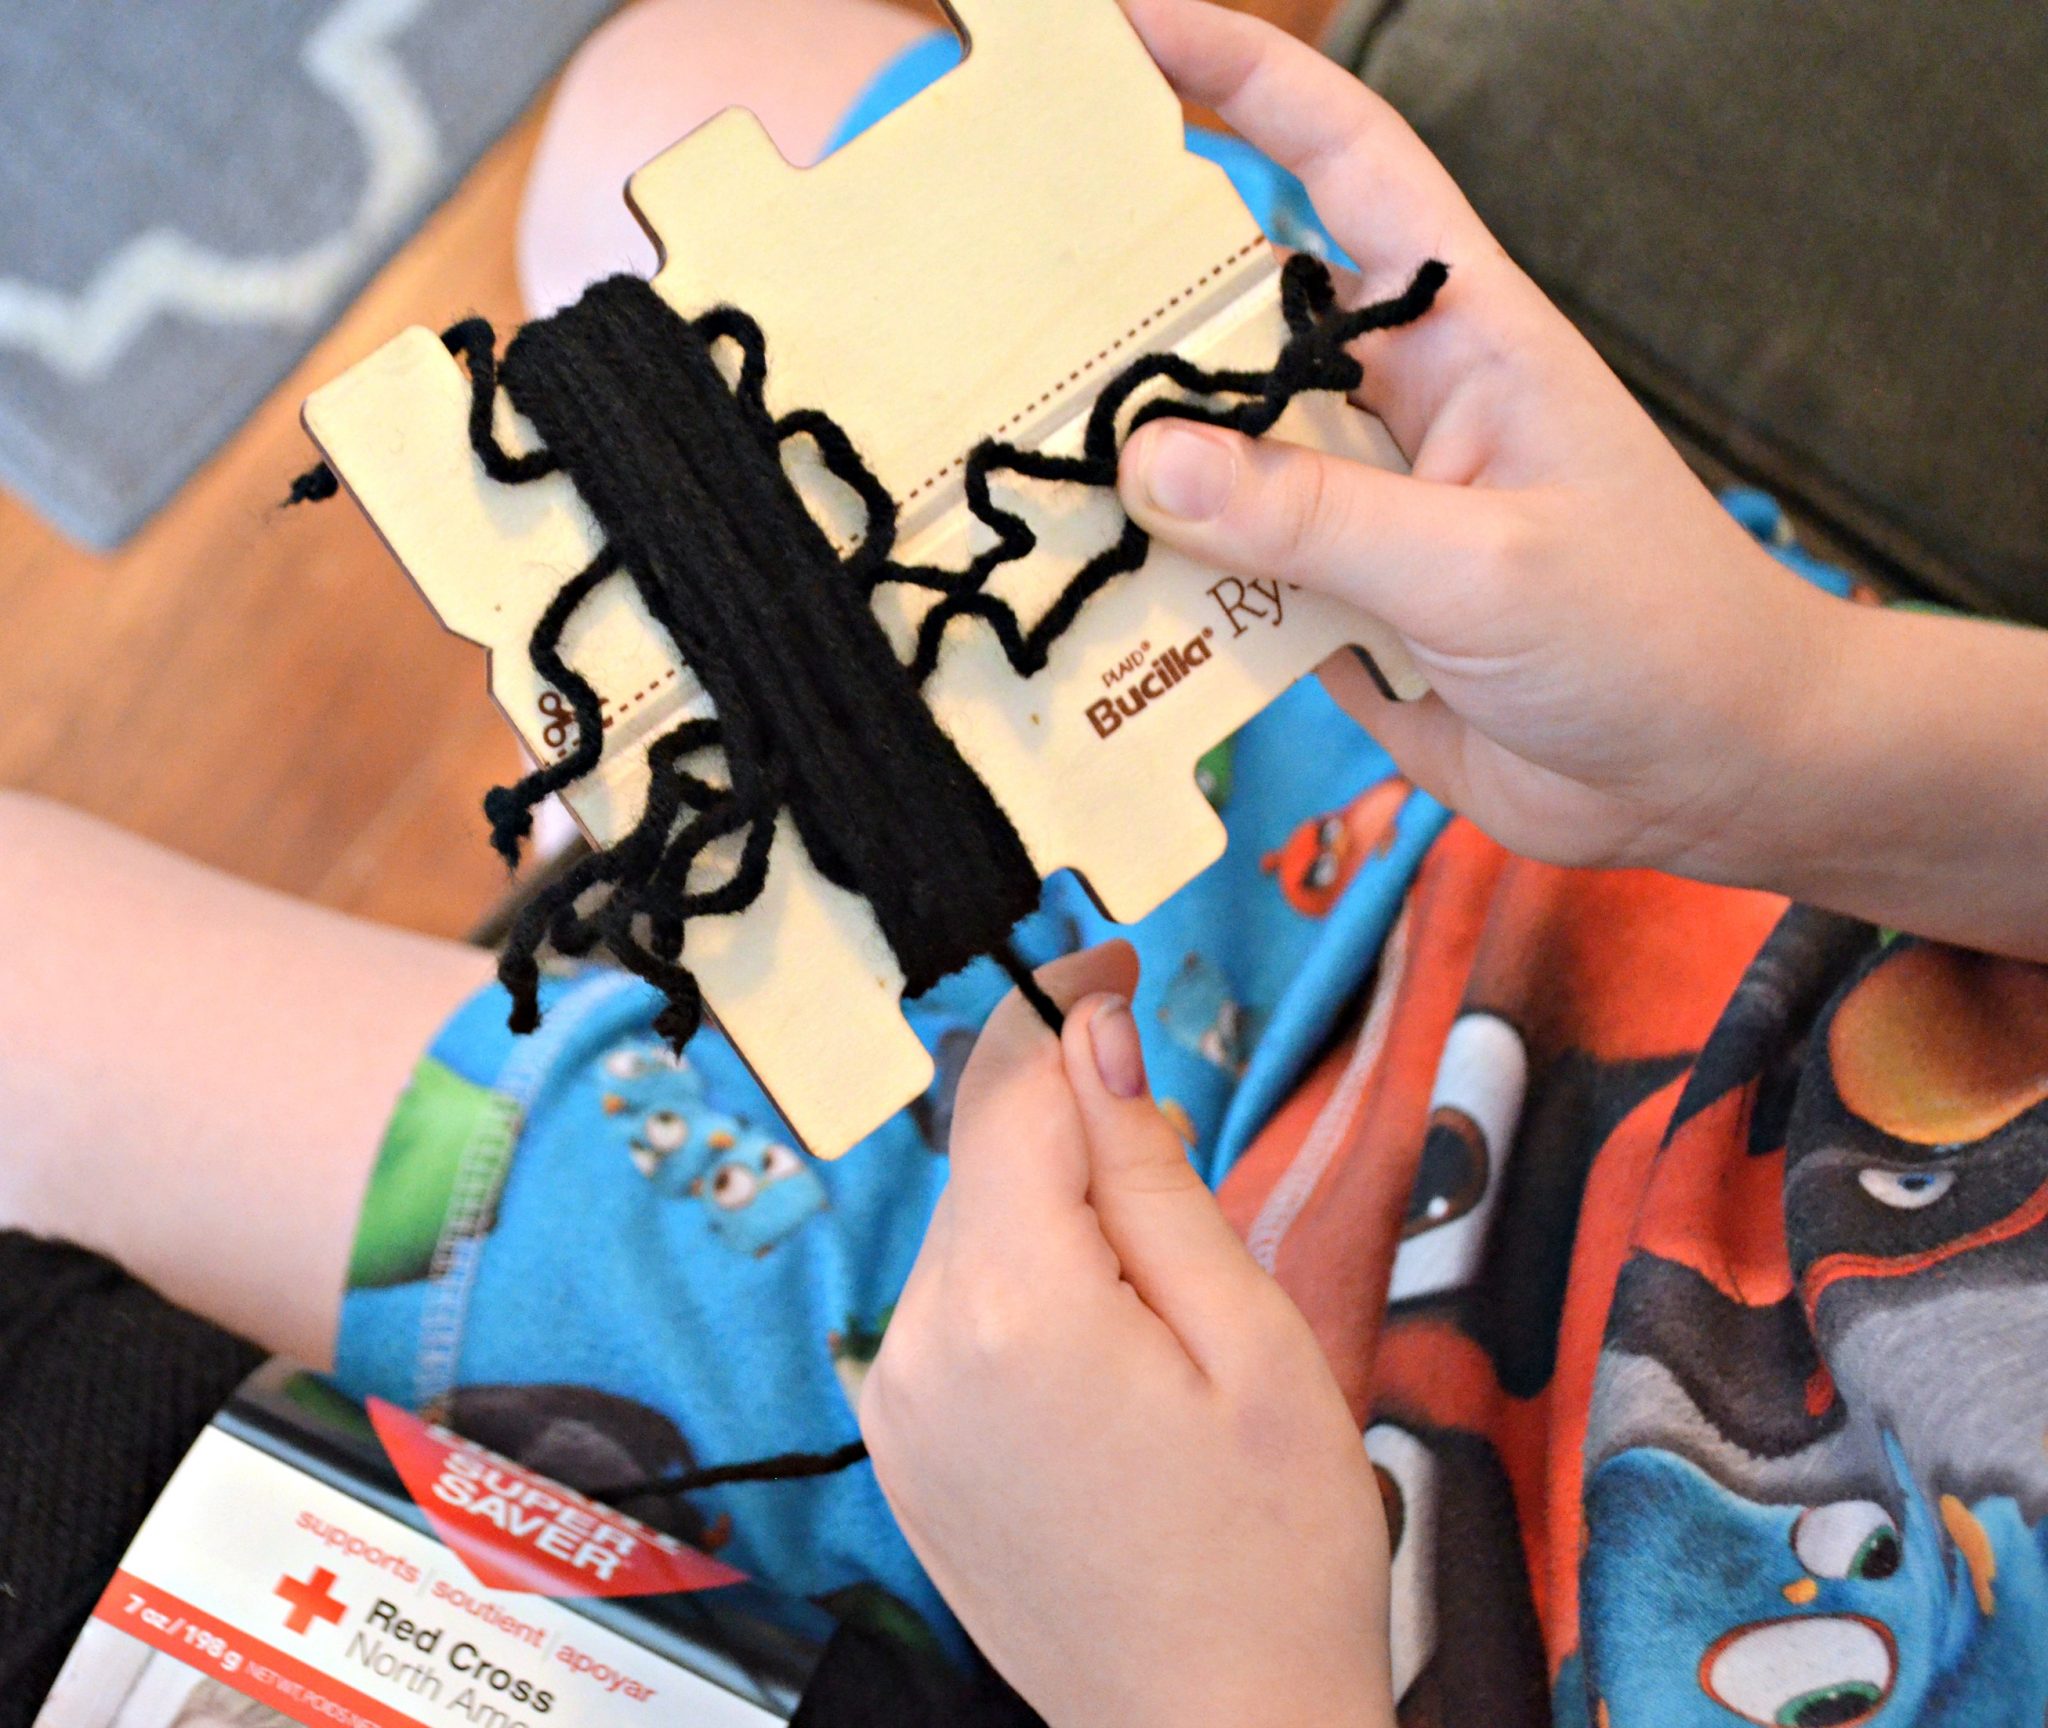
Step 3: Place the rubber bands on the tool, one in each set of horizontal notches.
This will hold the yarn in place while you trim your bundles.
Step 4: Adjust the horizontal strings so that each one is only under one of the bundles. Slide them up or down until they are at the very top and bottom of the tool as shown below. Tie each string tightly in a double knot.
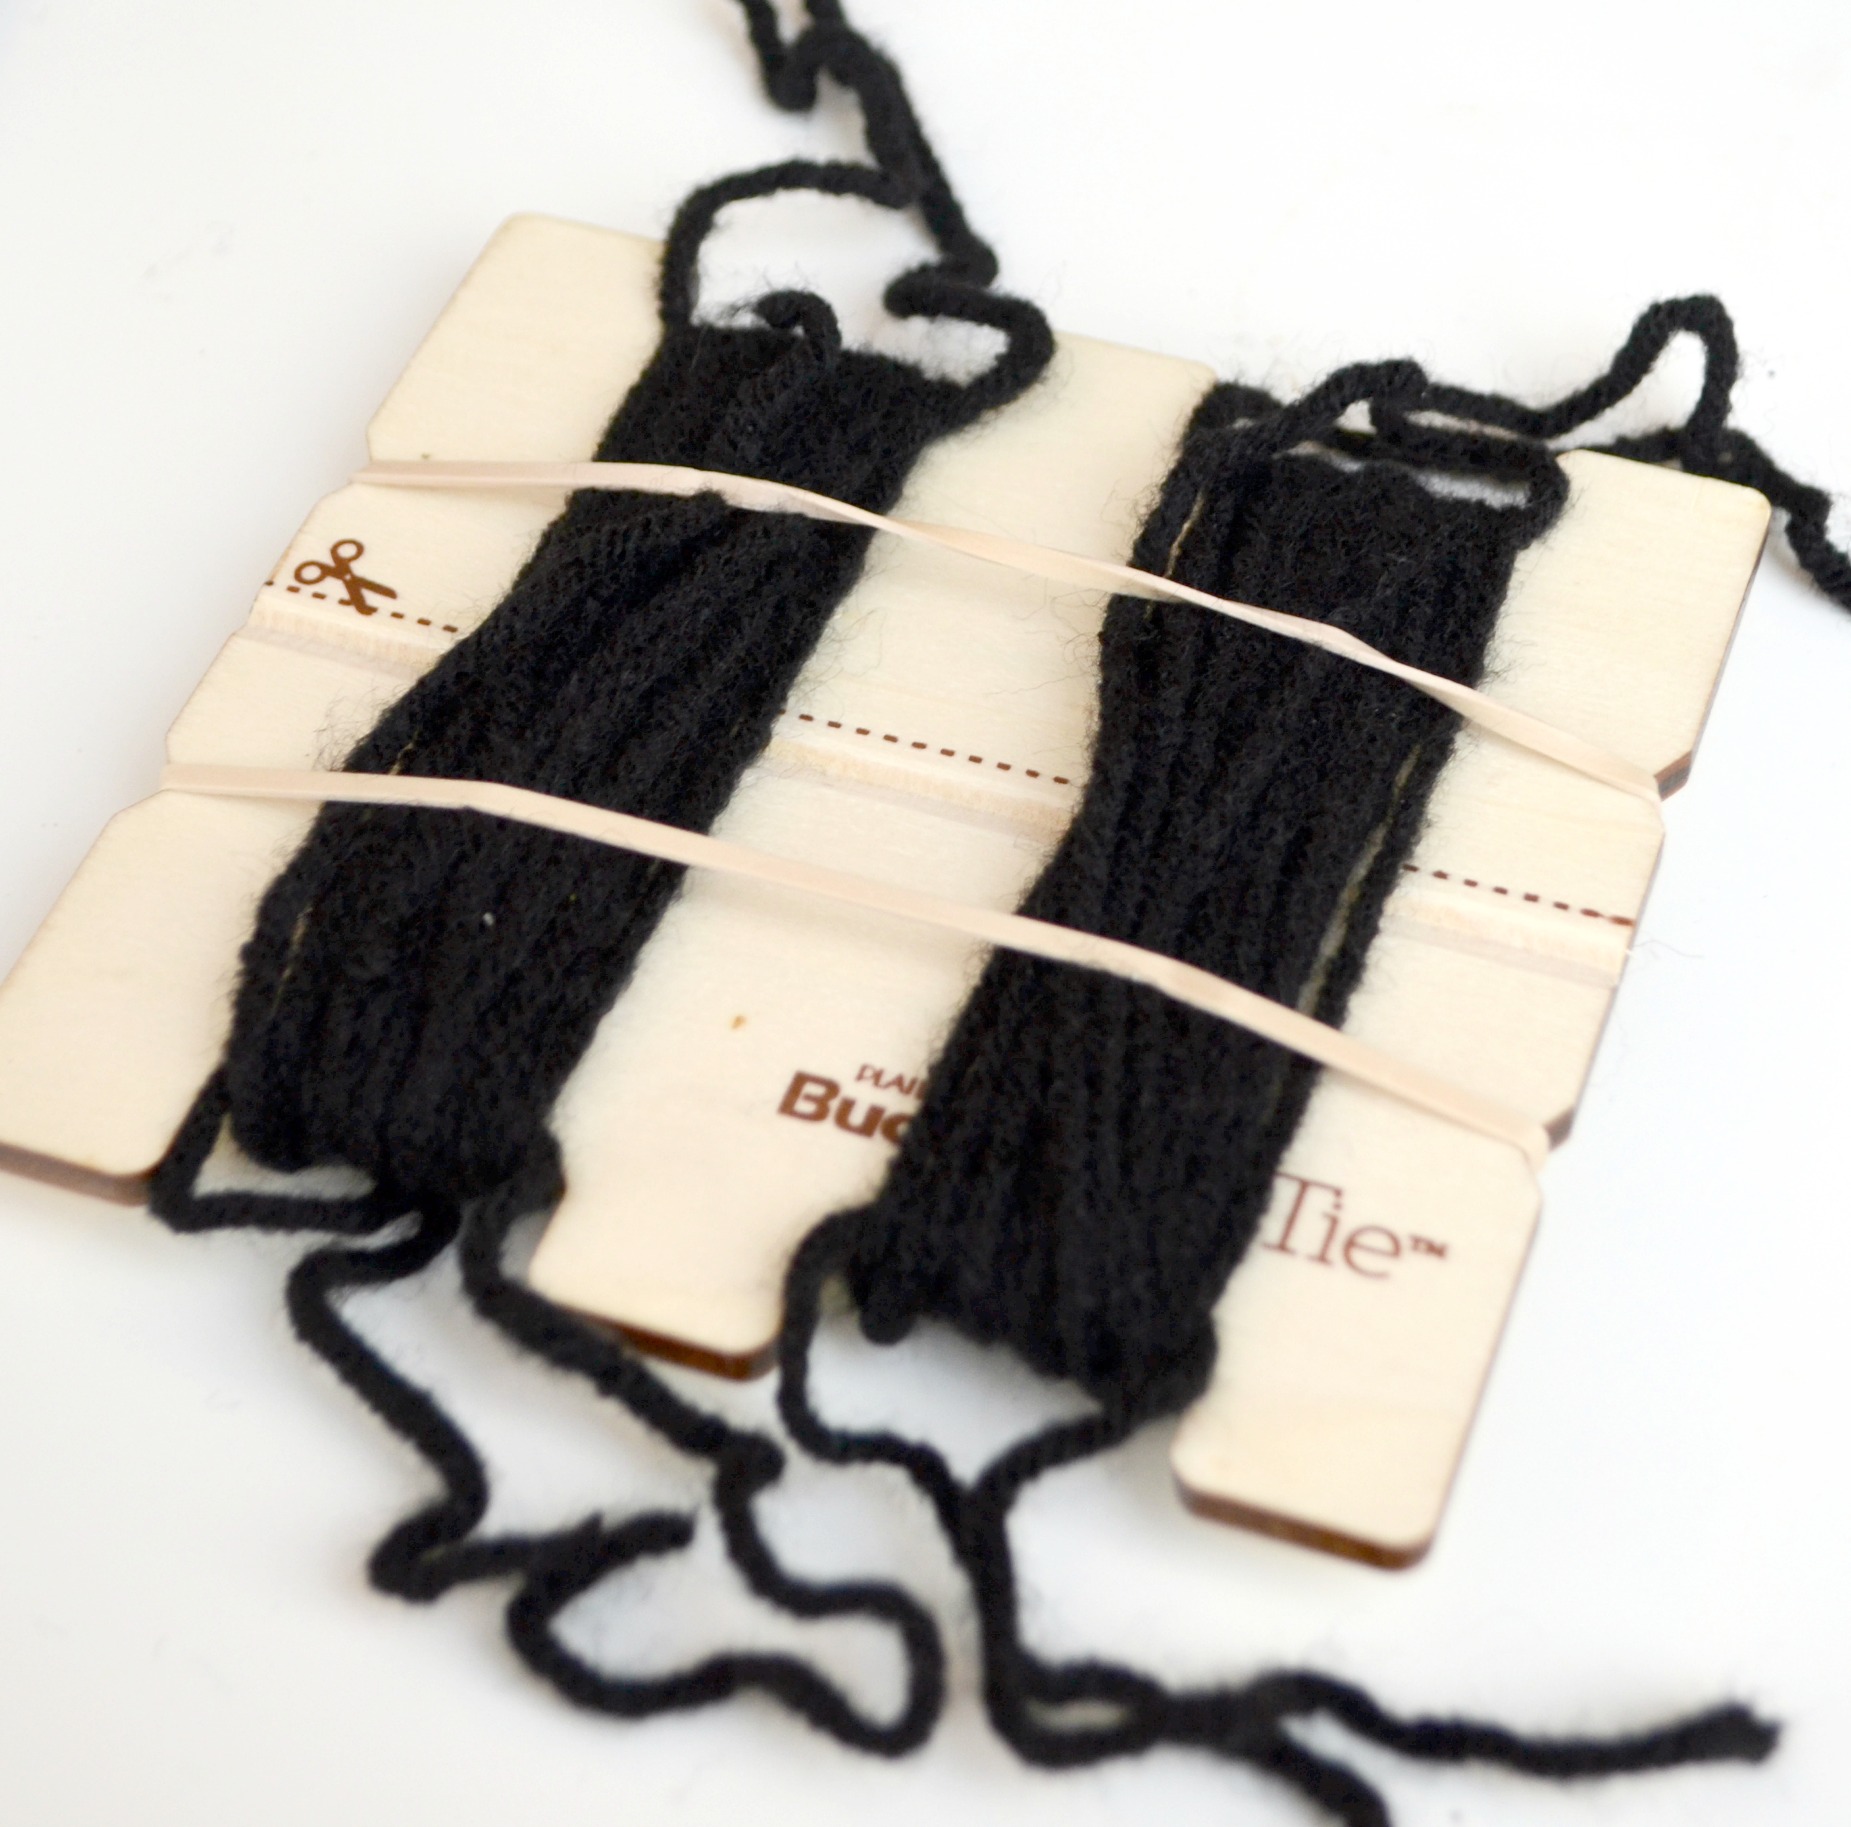
Step 5: Cut along the marked scissor line on both the front and back of the tool.
This should give you four bundles! Each one will have many short strings as well as the two long strings from the tie. Leave those long so that they can be tied onto the mesh fabric.

Now, you’ll repeat this process to make whatever number and colors of yarn bundles you need for your project. Our panda required 16 black bundles and
Creating the Panda
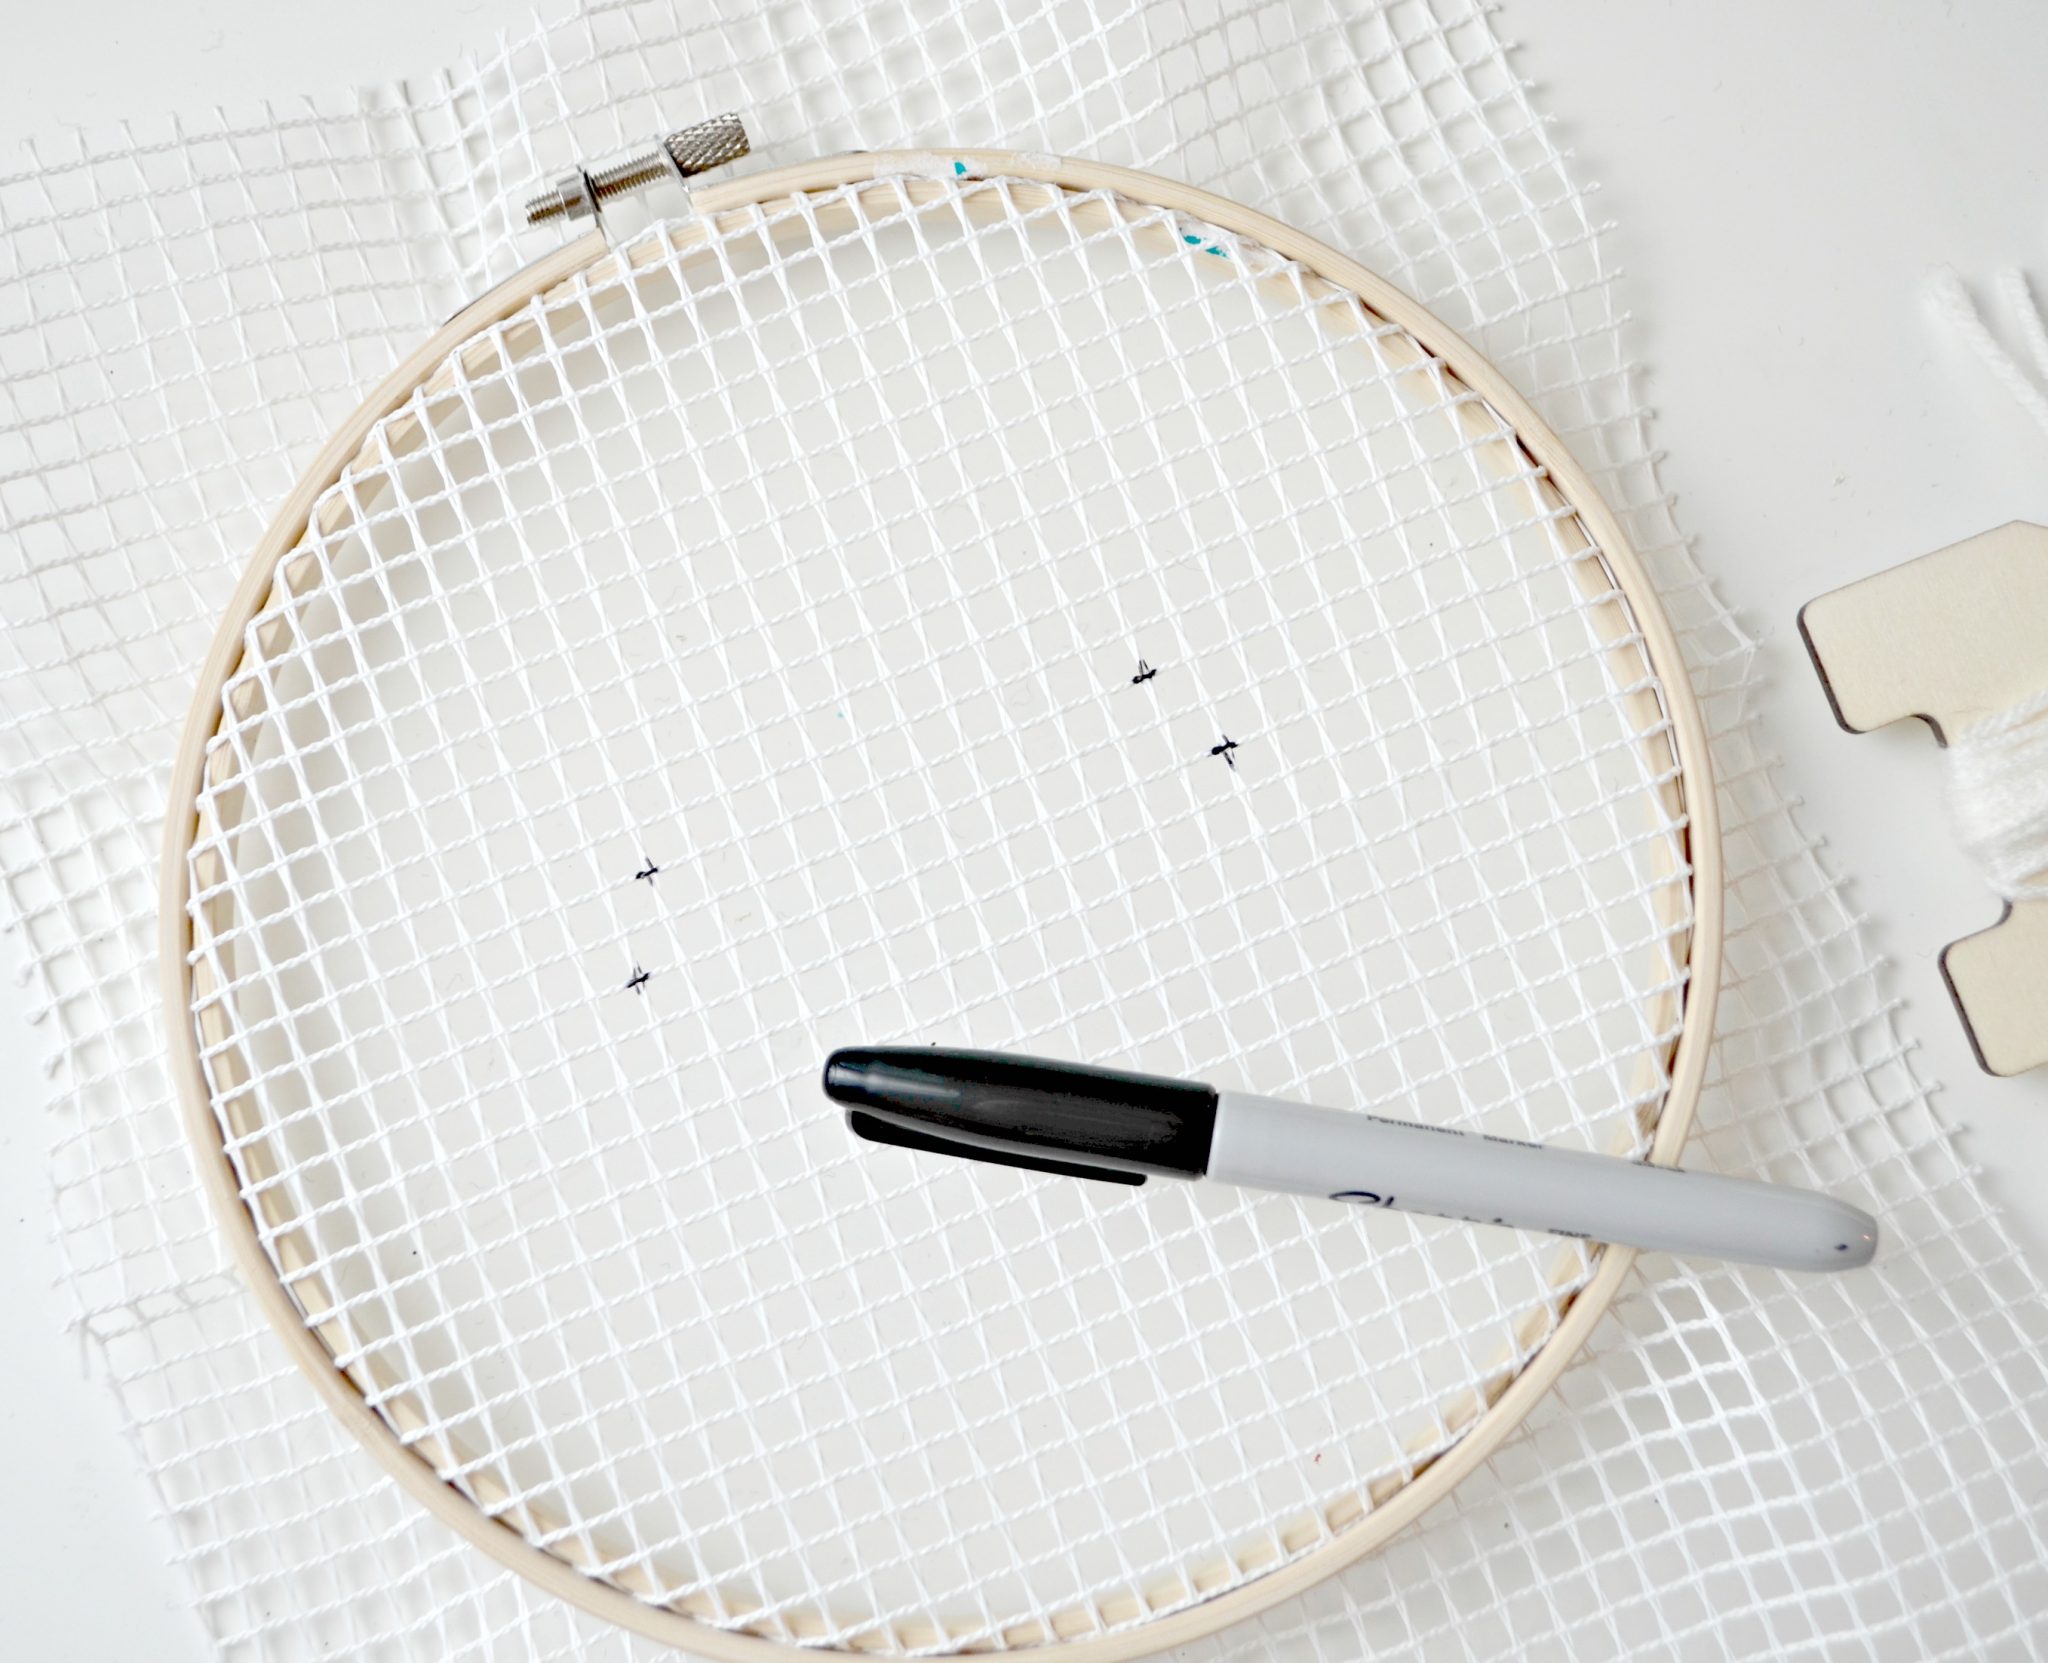
Step 1: Cut a 10″ square piece of the mesh fabric and place it securely inside the embroidery hoop.
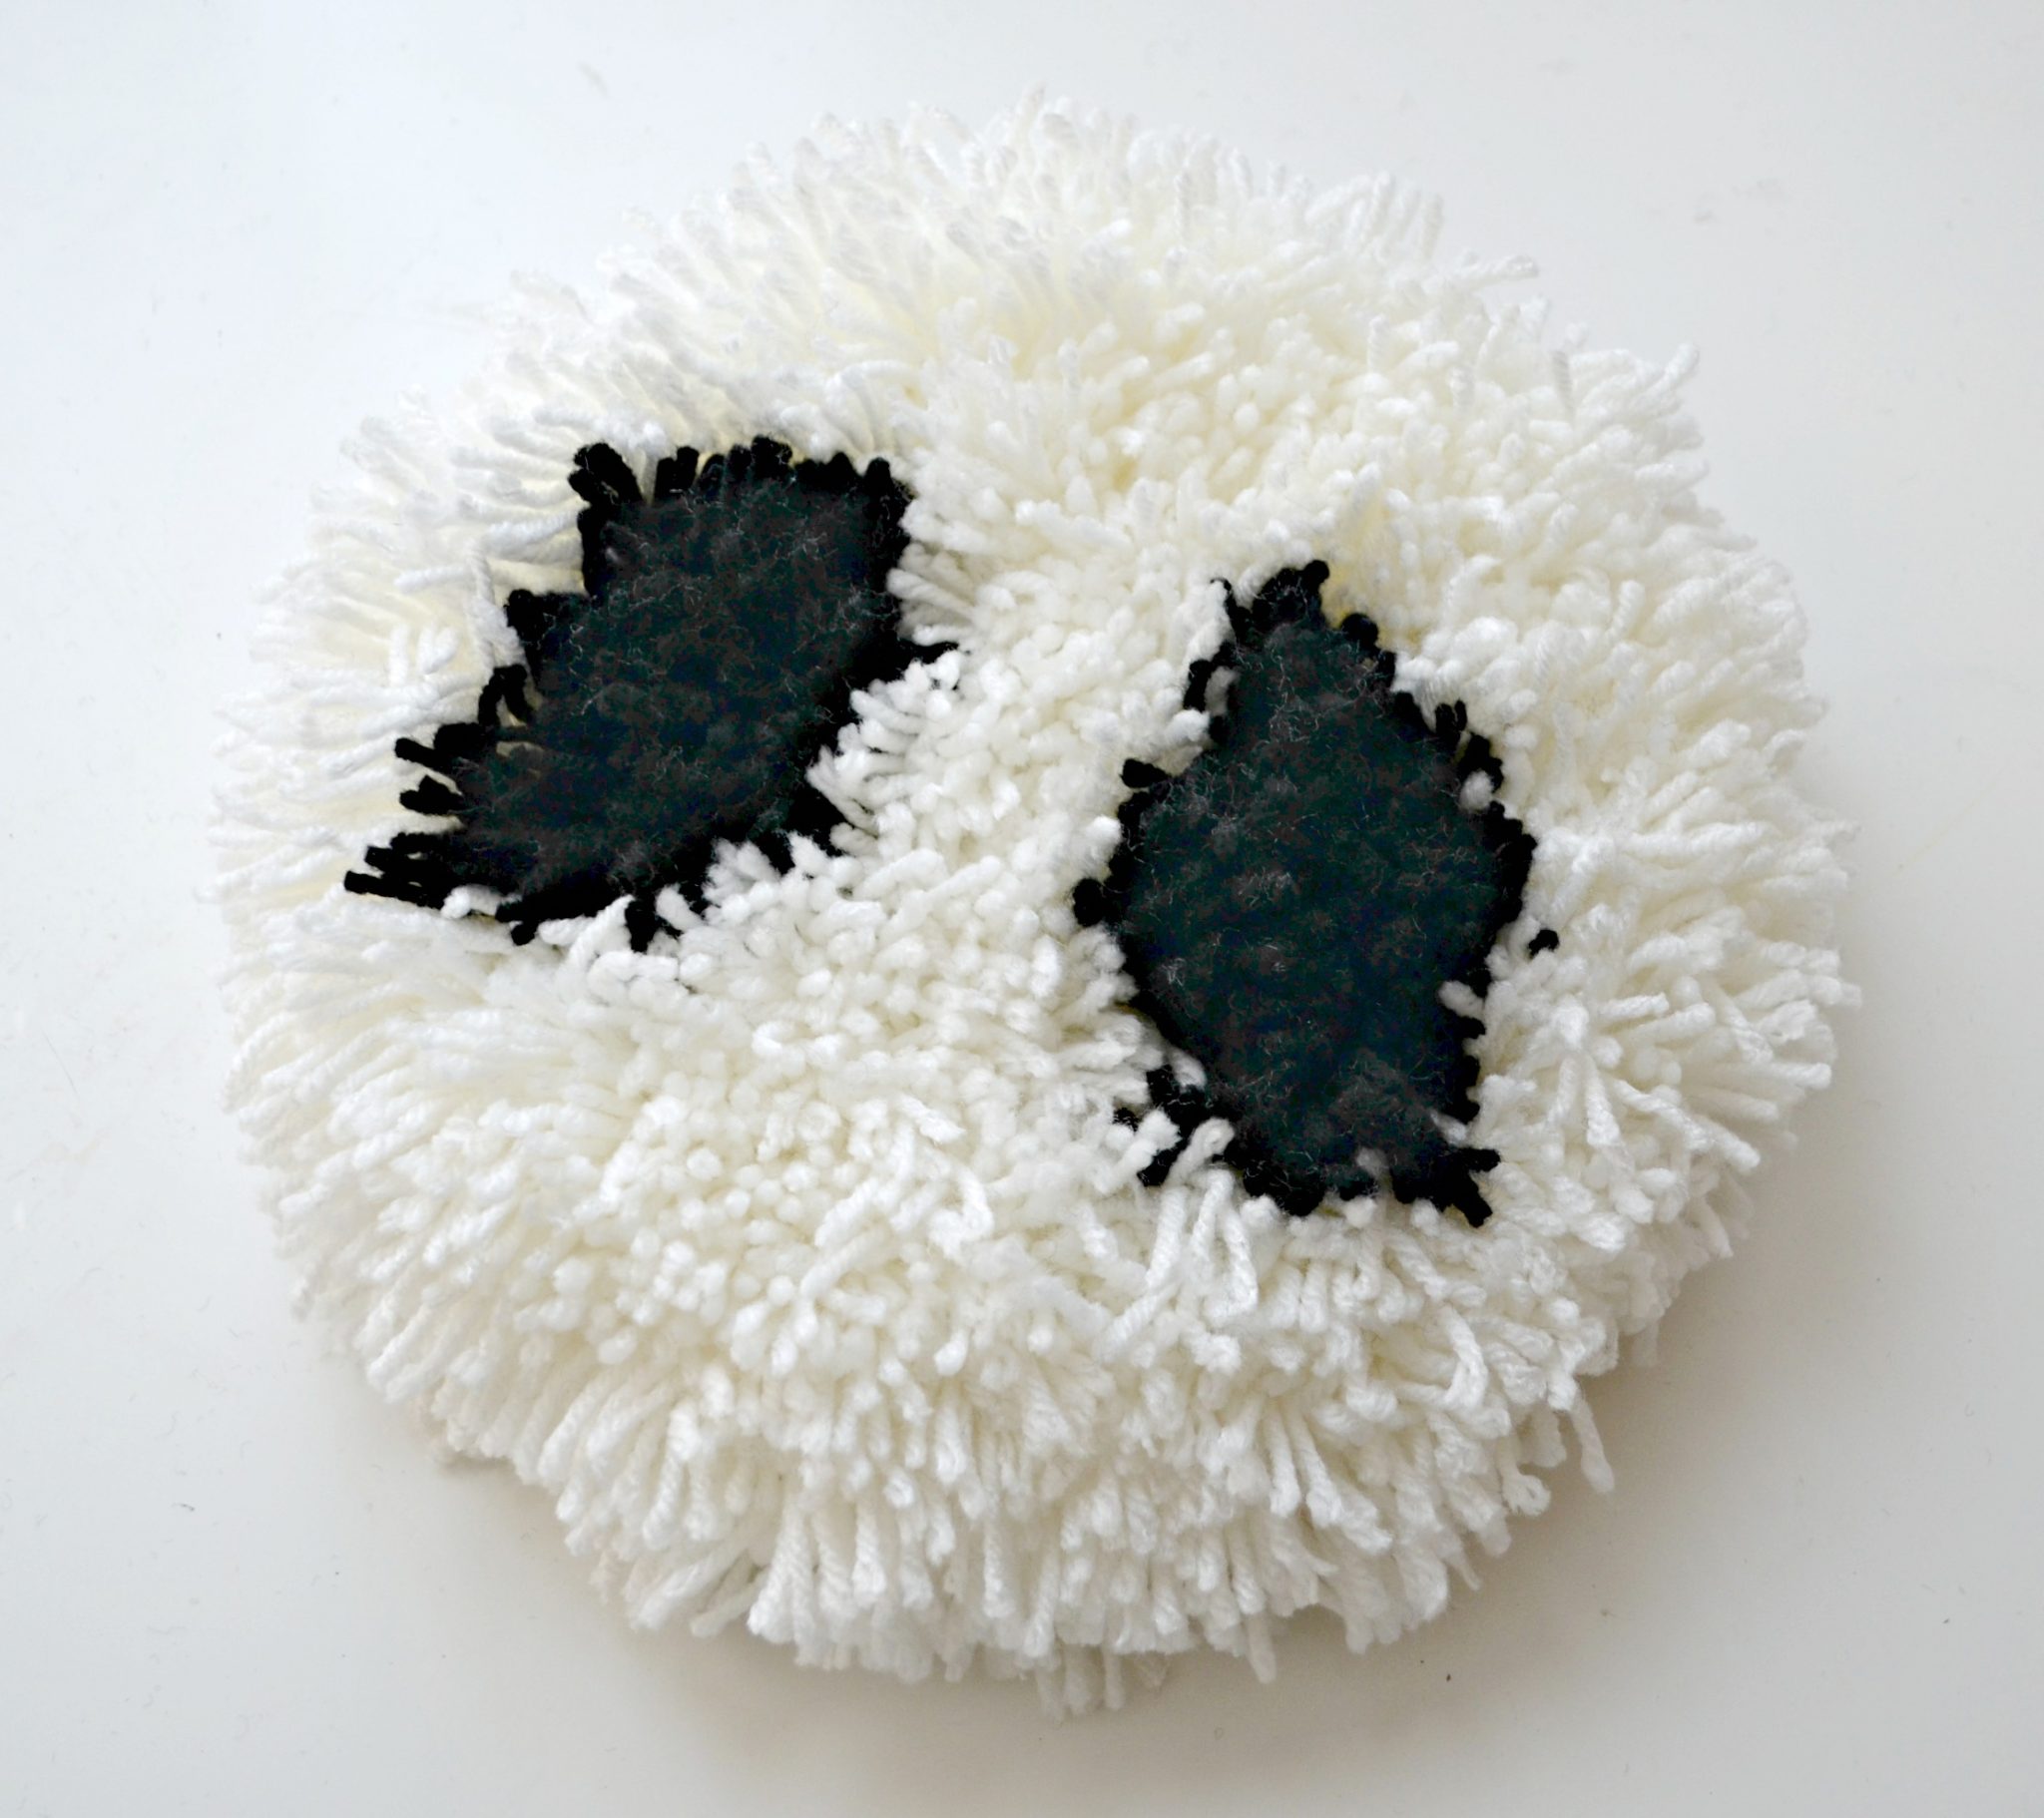
Step 2: Use a marker to show where you want your black “eye bundles” to go.
This part is a bit like counted cross stitch. I counted in 10 squares from each side and 12 down from the top to make my first two marks. Then, I went down two squares and over one for the next mark. In all, each eye took five bundles.
Step 3: Tie your bundles onto the mesh fabric.
To do this, you’ll want to place one of the tie strings through a square and the other through a square that’s on a diagonal from the first one. Flip your hoop and tie in a double knot. Now you can trim the ends.
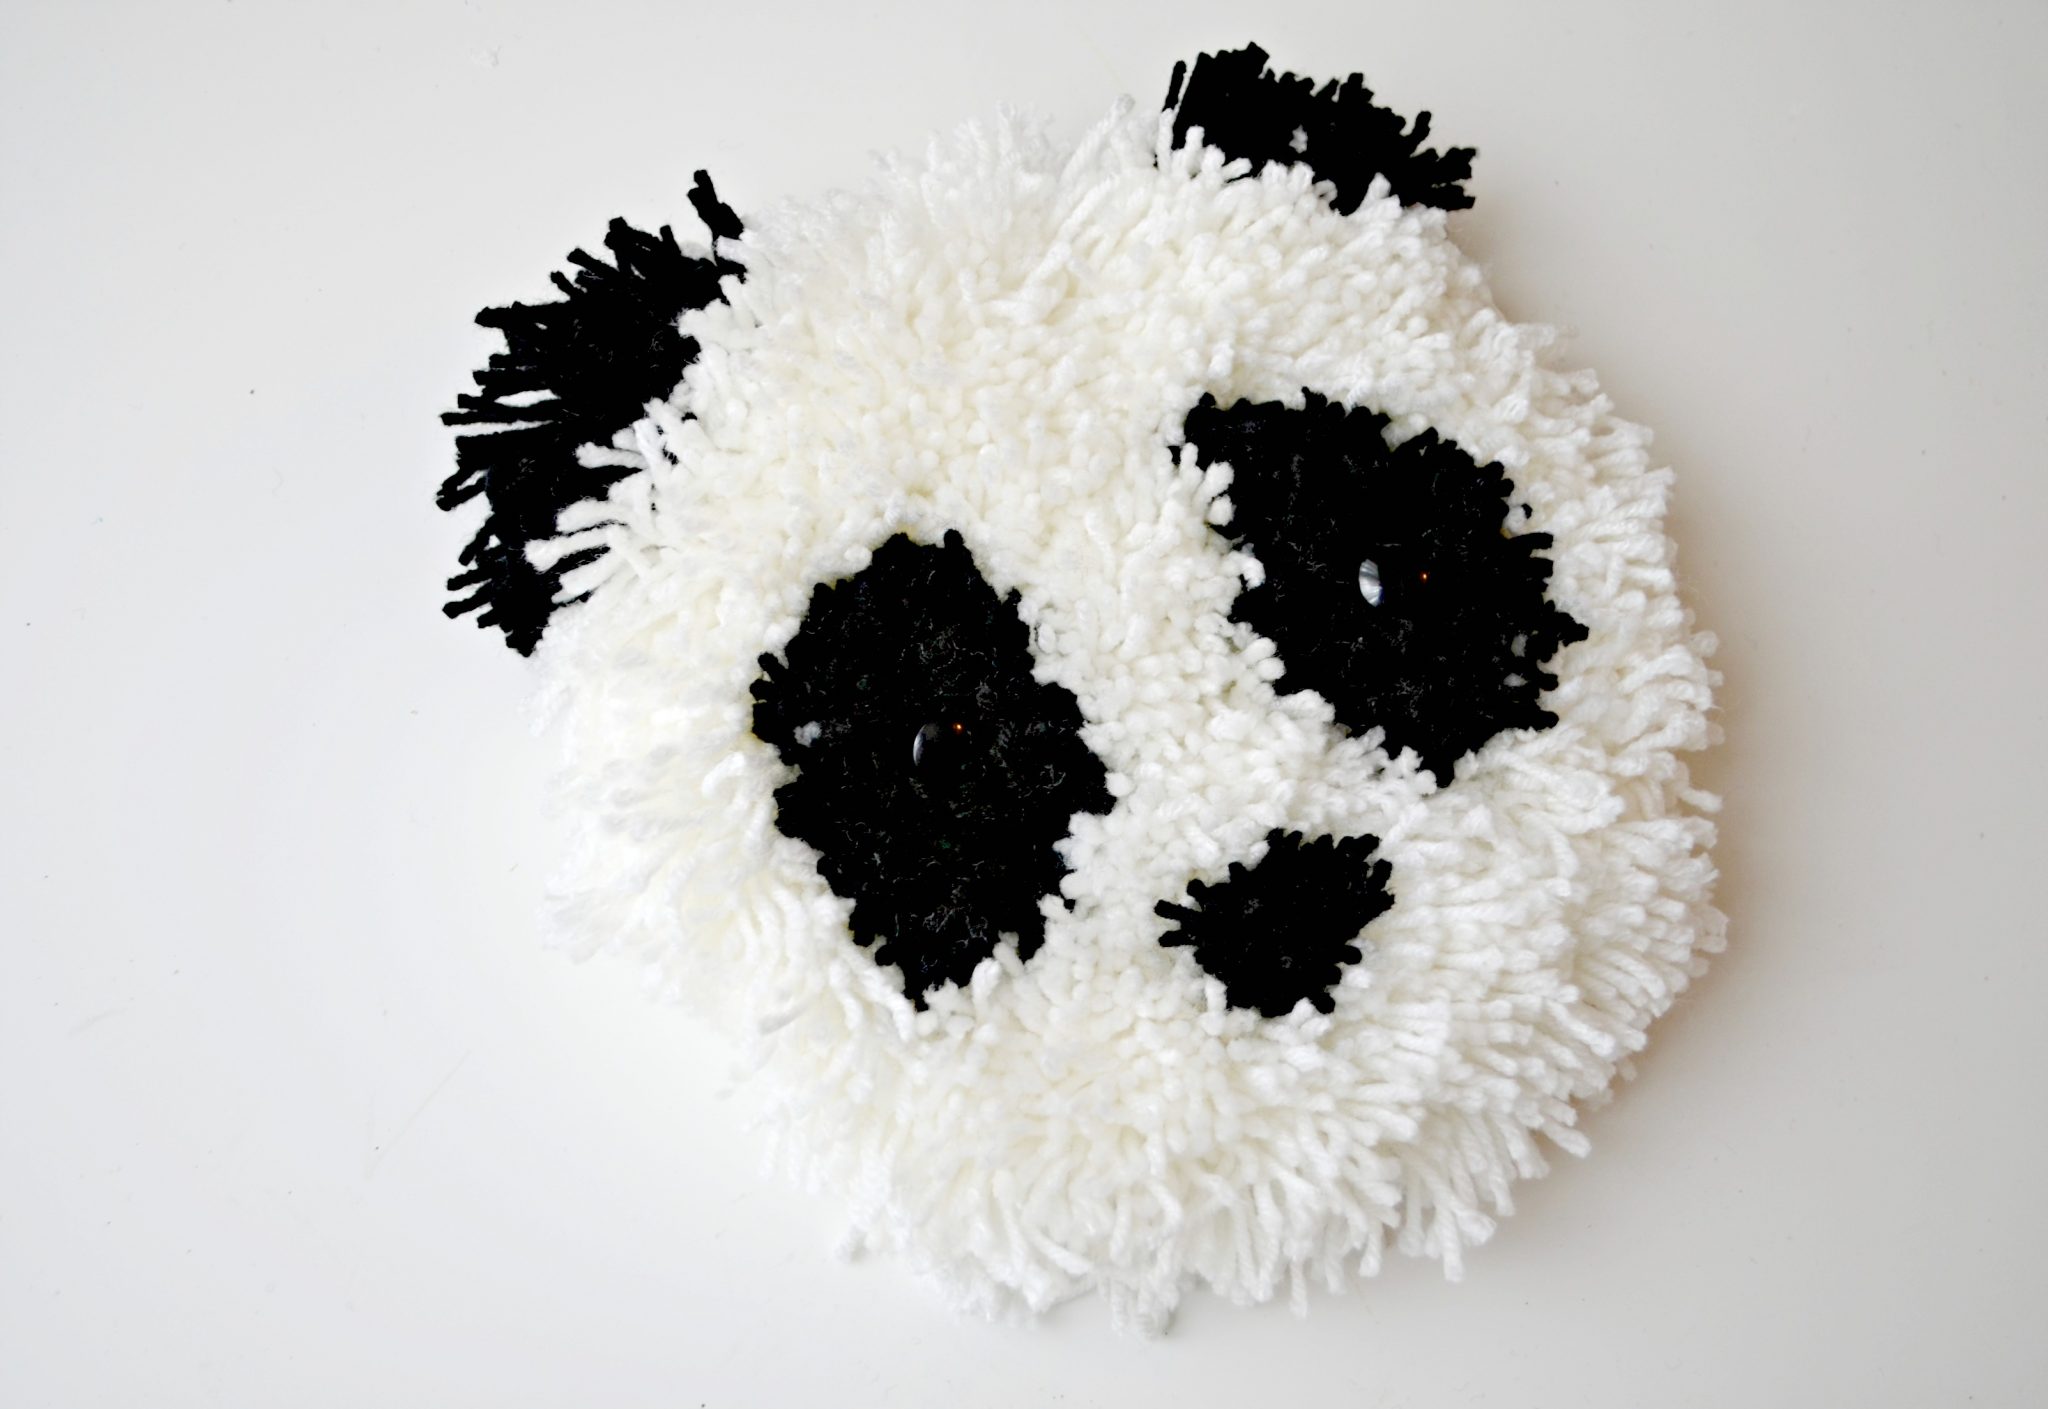
I have to confess that at this point, I was a little skeptical that this would turn out to be the cute fuzzy panda face I had envisioned. I mean, look at it. Wouldn’t you have been feeling the same way…?

Step 4: Fill in the hoop with white yarn bundles.
I started by tying a bundle at the top, bottom, and each side of the hoop, then tying another in between each set. If you imagine the hoop as a compass, I had one at each direction: N, NE, E, SE, S, SW, W, and NW. Does that make sense? This started to help define the circle. Then, I went back and started working from top to bottom, filling in all the empty spaces. I also tied in more bundles around the edges to fill out the circle.
Step 5: Tie on a bundle for the nose.
I found a spot between and below the eyes to tie on one black bundle for a nose. The nice thing about the bundles is that you can easily shape them by moving the strings around, so I pushed this one into an inverted triangle.
Step 6: Form the ears.
Each ear is made of three bundles tied onto the embroidery hoop itself. This made a little higher than the face.
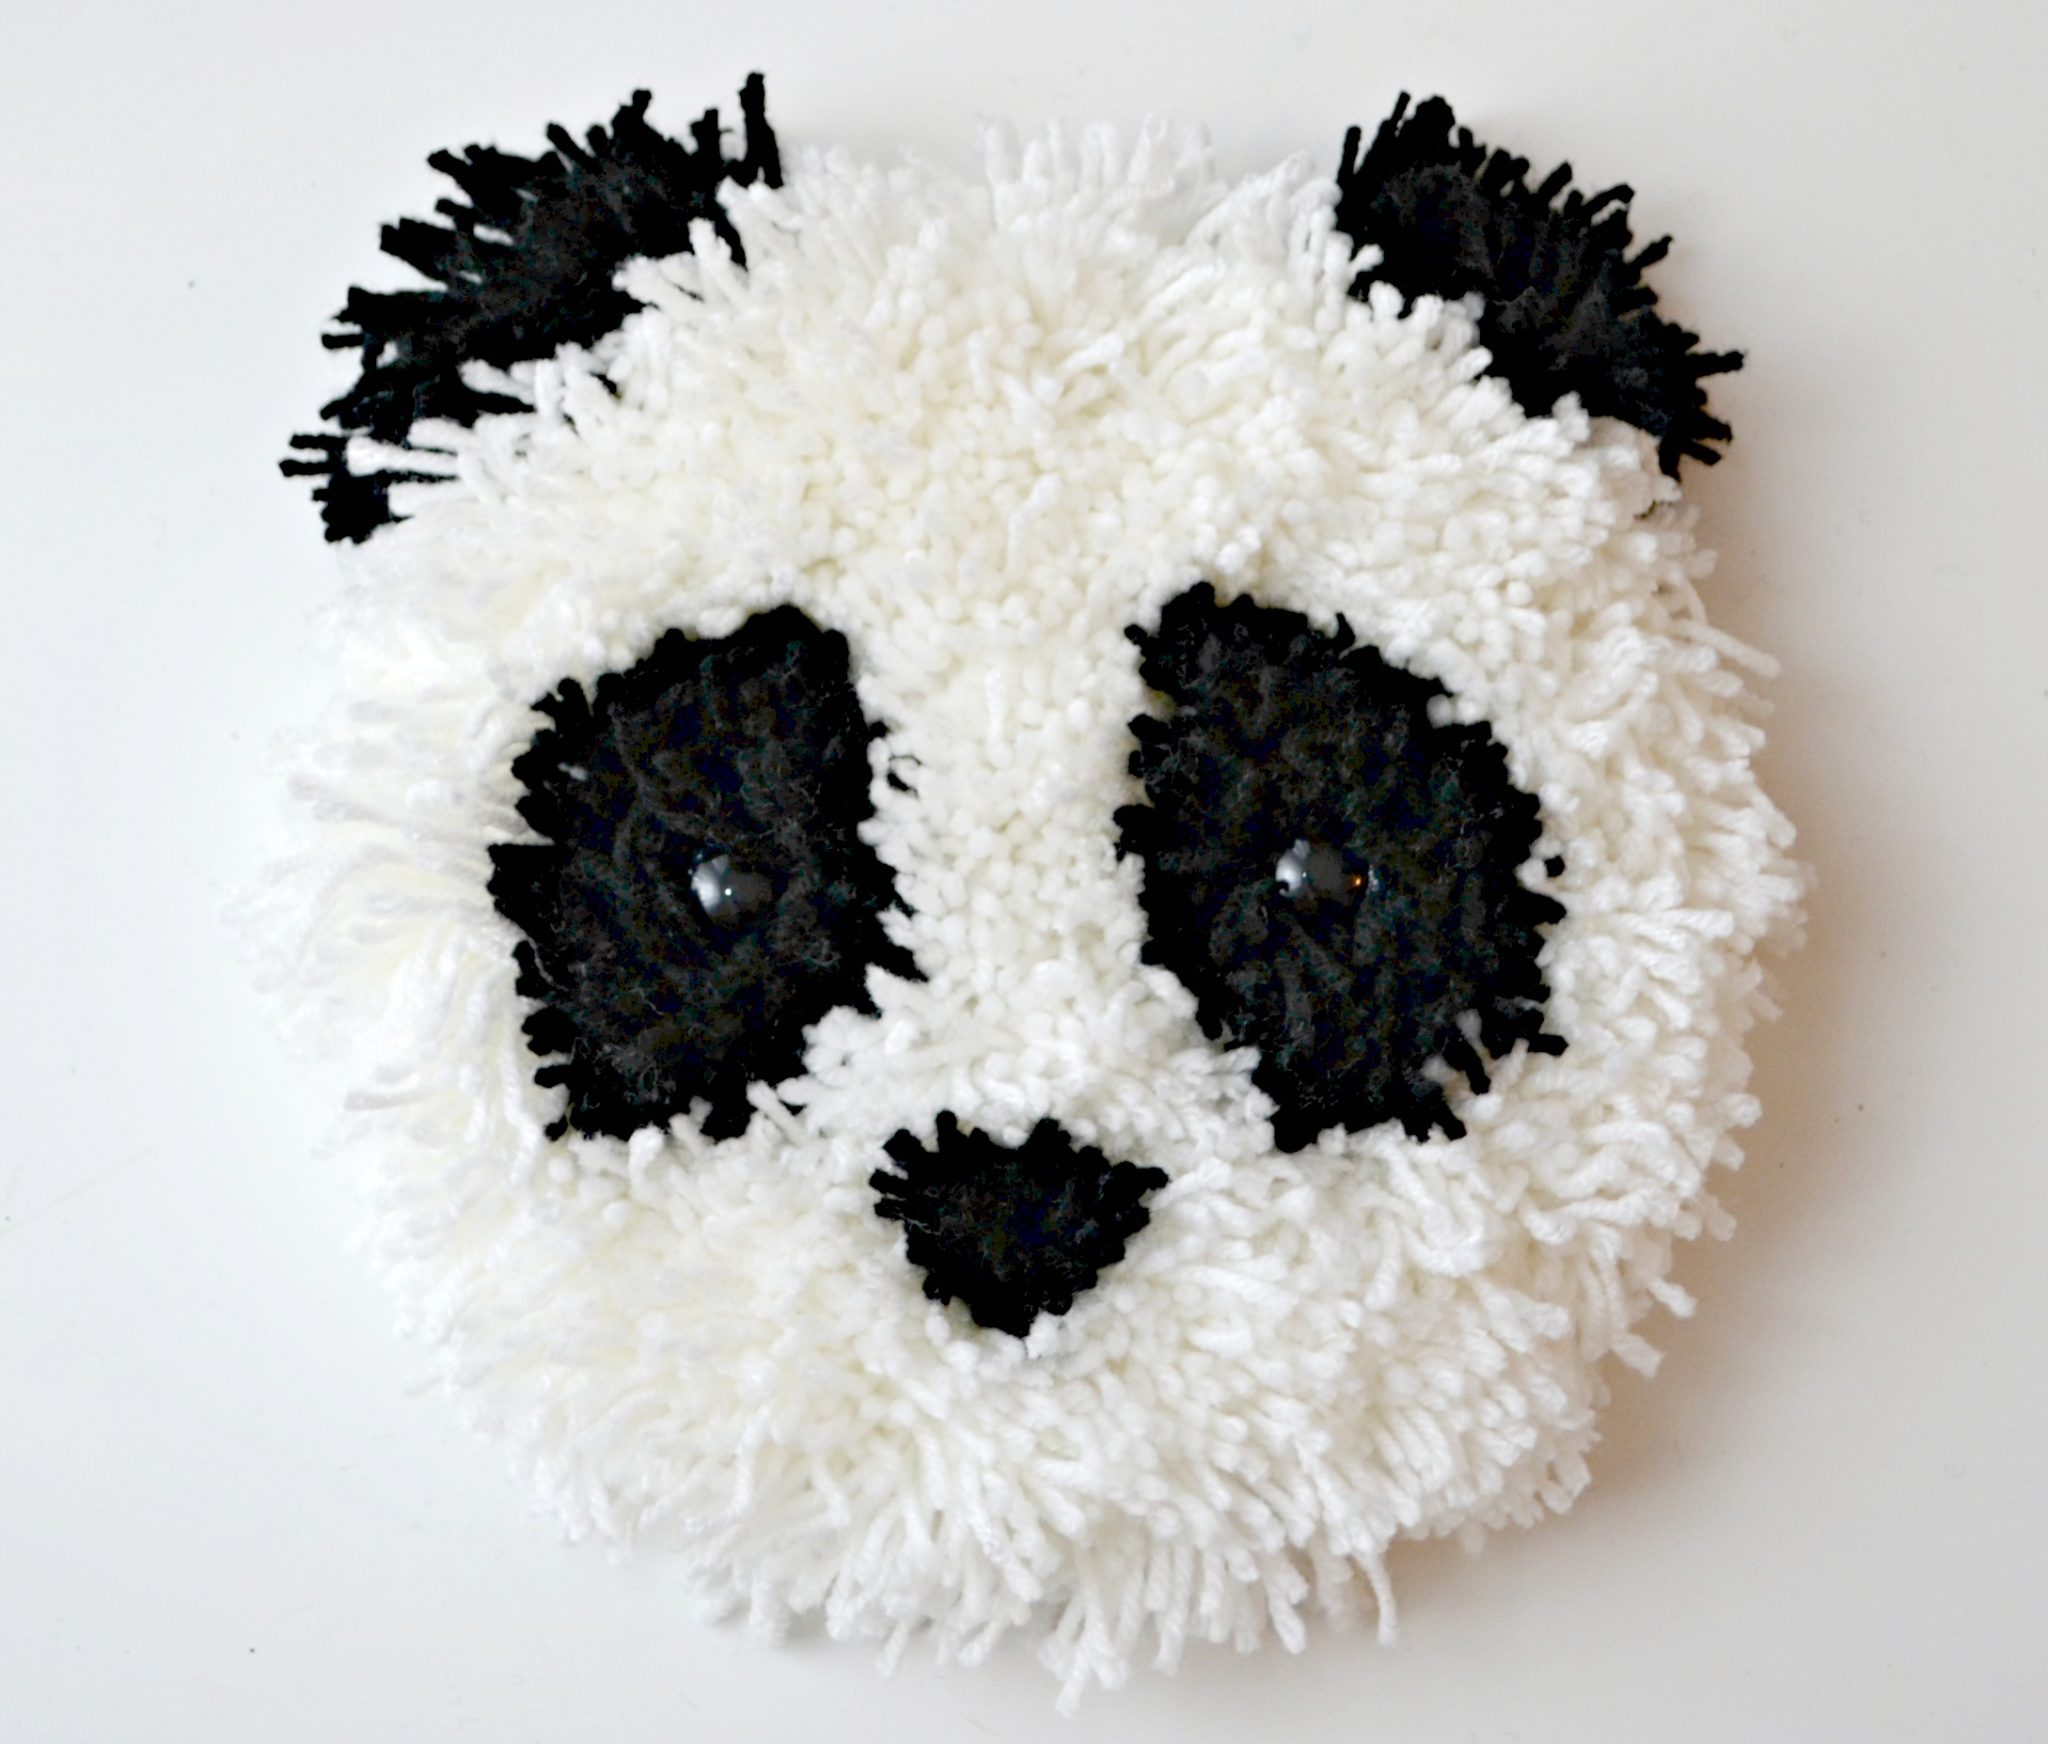
Step 7: Add eyes.
We used black buttons and used fabric glue to attach them to the string where we wanted them to be.
Ta-da! That’s all it takes to create this cute and fuzzy friend! It hangs on the wall easily since its base is an embroidery hoop. Little Crafter and I are both thrilled with the way our panda turned out, and we hope Scout will love it too!
What about you? Would you love to create a fuzzy wall hanging for your home? A rug? A pillow? Find the RyaTie kit in select Walmart locations, and visit Plaid Online for more information. In addition to the RyaTie Set of 2 Tools, there are also all inclusive kits available that contain yarn, a pattern, and everything you need to create something fabulous.
RyaTie isn’t the only new thing from Bucilla this year; there’s also the Bucilla Weaving Loom, a versatile loom ideal for a variety of woven handmade projects, ranging from wall art to home decor to fashion. I shared about my experience with the loom in this Basic Weaving post as well as a followup post with more stitch ideas, so be sure to check those out!
There are also a series of new Weave it n’ Leave It kits that allow you to create unique, hand-woven pieces without a loom. They’re super cute and I think you’re going to love them. For more crafty inspiration using these new products, be sure to check out Plaid on Facebook, Instagram and Pinterest!
Happy creating, friends!


2 Comments